How to apply car window decals effectively


Adding window decals to your car isn’t just for looks. It’s a smart way to share a message or promote a business. These decals can last a long time. Opaque and clear window decals stay bright for up to five years. Permanent window decals are made to last, while removable ones are great for short-term use. They are also very effective. Did you know car window decals can be seen by 30,000 to 70,000 people every day? That’s a lot of attention on your car! Here’s a fun fact: 91% of people notice them, and they can change how 75% of people see a business. Whether you want a cool design or to advertise, putting window decals on the right way makes them stand out and last longer.
Key Takeaways
- Pick a decal that matches your style or need. Regular vinyl lasts 3-5 years, but premium vinyl lasts up to 8 years.
- Get your tools ready before you begin. You’ll need glass cleaner, a soft cloth, a squeegee, masking tape, and measuring tools for easy application.
- Clean the window well to remove dirt and grease. A clean window helps the decal stick better and stay longer.
- Use masking tape to line up the decal carefully. Measure to make sure it’s straight and centered before sticking it on.
- Choose the dry or wet method based on your preference. The wet method is easier to adjust, especially for big decals.
- Wait 15-30 minutes after applying the decal to remove the transfer tape. This helps the adhesive stick properly.
- Check the decal for air bubbles or mistakes after applying. Use a squeegee to smooth bubbles and secure the edges.
- Take care of your decals by cleaning them gently with mild soap. Avoid strong cleaners to keep them bright and in good shape.
Gather Your Materials
Before putting on window decals, get the right tools first. Having everything ready makes the job easier and gives better results.






Tools You’ll Need for Window Decals
Your chosen decal
Pick a decal that fits your style or purpose. It could be a cool design or a simple logo. Standard vinyl lasts 3-5 years, while premium vinyl stays bright for up to 8 years.
Glass cleaner and soft cloth
Clean windows are very important. Use glass cleaner to remove dirt and grease. A soft microfiber cloth prevents scratches.
Squeegee or card
A squeegee or even a credit card helps smooth the decal. It removes air bubbles and makes the decal stick evenly.
Masking or painter’s tape
These tapes hold the decal in place while you adjust it. They’re easy to peel off and won’t leave sticky marks.
Measuring tape or ruler
Use a measuring tape or ruler to center and align the decal perfectly.
Spray bottle with soapy water (optional)
For wet application, soapy water in a spray bottle helps you move the decal before it sticks.
Tip: Keep all your tools nearby to avoid stopping midway.
Here’s a quick look at materials and how long they last:
| Material Type | How Long It Lasts |
|---|---|
| Standard Vinyl | 3 to 5 years |
| Premium Vinyl | Up to 8 years |
Why Tools Matter
Using proper tools isn’t just easier—it gives better results. Imagine applying a decal without a squeegee or tape. You’d get air bubbles, crooked placement, or it might not stick well.
Experts say preparation is key. Choose simple, good-quality designs. Bigger fonts and bold colors are easier to see. A clean surface helps the decal stick better.
Good tools save time and effort. They make the process smooth and reduce mistakes. With everything ready, you can apply your window decals like a pro!
Get the Window Ready
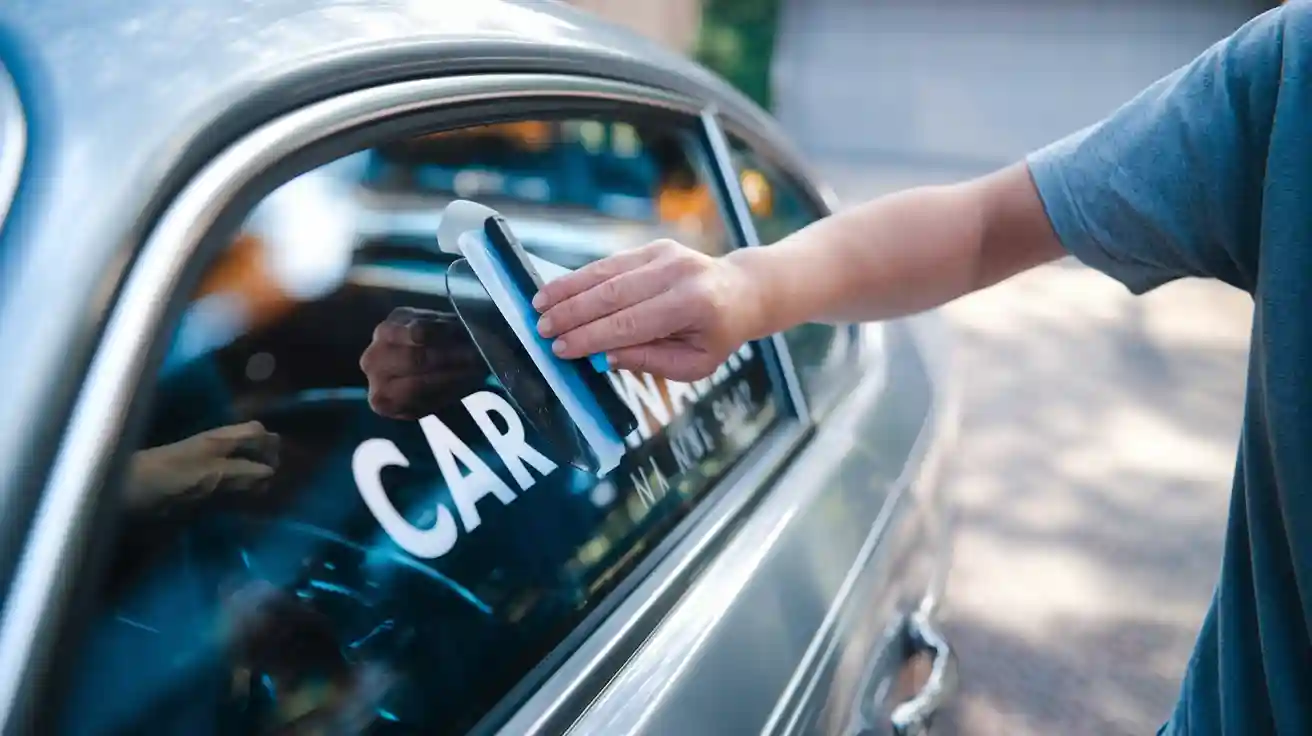
Before putting on window decals, make sure the window is ready. A clean, smooth surface helps the decal stick well and last longer. Follow these simple steps.
Clean the Car Window
Use glass cleaner to remove dirt and grease
Spray glass cleaner evenly on the window. Hold the bottle 8-12 inches away. Use smooth sprays to avoid soaking the glass. For inside windows, spray the cleaner on a cloth instead to stop overspray.
Wipe the window with a microfiber cloth. Start at the top and wipe straight down. This removes dirt and grease completely. Finish by buffing the glass with a dry cloth in small circles. This makes the window streak-free and ready for the decal.
Tip: Microfiber cloths are soft and reusable. They clean without scratching and save money.
Dry the window completely
After cleaning, make sure the window is dry. Any water left can stop the decal from sticking. Use a dry microfiber cloth to soak up water. A squeegee can also help remove extra moisture.
Check the Window
Look for sticky residue or scratches
Inspect the window closely. Check for sticky spots from old decals or scratches. These can stop the decal from sticking well. Use rubbing alcohol on a cloth to clean off any residue.
Make sure the window is fully dry
Double-check that the window is dry before continuing. Even a little water can weaken the adhesive. If it’s humid, let the window air dry longer.
Pro Tip: Apply decals when it’s 60-74°F. This temperature helps the decal stick better and avoids bubbles.
Why Cleaning Matters
Preparing the window has many benefits. Here’s why it’s important:
| Benefit | Why It Helps |
|---|---|
| Right Temperature | Applying decals in the right temperature improves sticking. |
| Proper Curing Time | Giving adhesives time to set makes them stronger. |
| Long-Lasting Results | Cleaning and waiting 24 hours before water exposure keeps decals durable in tough conditions. |
By cleaning and checking the window carefully, you ensure a perfect application. This step makes your window decals look great and stay put for years.
Position the Window Decal
Getting your window decal in the right spot is important. It makes your car look neat and professional. Take your time and follow these steps for the best results.
Aligning the Decal
Use masking tape to hold the decal in place
Peel off a small part of the decal’s backing paper. Put the decal on the window where you want it. Don’t stick it down fully yet. Use masking tape to keep the edges steady. This helps you adjust it without it moving. Masking tape is easy to remove and won’t leave sticky marks.
Measure and adjust to center the decal
Take a ruler or measuring tape to check the placement. Measure from the window’s edges to the decal to ensure it’s centered. Adjust it until it looks just right. Spending a few extra minutes now avoids crooked decals later.
Pro Tip: For vinyl letters, peel the backing one letter at a time. This keeps everything straight and neat.
Marking the Placement
Mark the edges with tape
When you’re happy with the position, use small pieces of tape to mark the corners or edges. These marks guide you when you start sticking the decal. They help keep it in the right spot.
Check the alignment again
Step back and look at the decal. Does it look straight? Is it centered? If something seems off, fix it now. Double-checking saves you from redoing the whole thing later.
Tip: Apply decals when it’s 60°F to 74°F. This helps the adhesive stick better and prevents peeling.
Tips for Perfect Placement
- Clean the window well and dry it completely. Dirt or water can ruin the adhesive.
- Spray soapy water on the window and decal if using the wet method. This lets you move the decal before it sticks.
- Use a squeegee or card to smooth the decal and remove bubbles. Start in the middle and push outward.
- Don’t rush. Taking your time means fewer mistakes and better results.
By following these steps, your decal will look great and stay in place. Proper positioning makes it look better and helps it do its job well.
Apply the Window Decal
Now it’s time to put on your window decal! Whether you use the dry or wet method, these steps will help you get a smooth and neat finish.
Dry Application Method
Carefully remove the backing paper
Peel the backing paper off slowly. Be gentle to avoid ripping or stretching the decal. If the design is detailed, take extra care to keep it intact.
Stick the decal starting from one side
Place the decal on the window. Press it down starting at one edge and move across. This helps stop air bubbles from forming underneath.
Smooth it out with a squeegee or card
Use a squeegee or a credit card wrapped in cloth. Press firmly and smooth the decal from the center outward. This makes sure it sticks evenly and looks great.
Tip: Don’t worry about small air bubbles. You can fix them later.
Wet Application Method
Spray soapy water on the window
For the wet method, spray the window lightly with soapy water. This makes the surface slippery, so you can adjust the decal easily.
Place and adjust the decal
Put the decal on the wet window. Slide it into the right position. Take your time to make sure it’s aligned perfectly.
Remove water and bubbles with a squeegee
Once the decal is in place, use a squeegee to push out water and air bubbles. Start in the middle and push outward. Wipe away extra water with a clean cloth.
Pro Tip: The wet method works best for big decals or when you need more time to adjust.
Fixing Air Bubbles
Push bubbles out with a squeegee
Check for air bubbles after applying the decal. Use a squeegee to gently push them toward the edges. Go slowly to avoid damaging the decal.
Pop stubborn bubbles with a pin
If a bubble won’t move, use a pin to pop it. Gently press the bubble with the pin to let the air out. Then smooth it with the squeegee.
Removing air bubbles makes the decal look flat and neat. A credit card wrapped in cloth can also help with this step.
| Application Method | Important Tips | Performance Features |
|---|---|---|
| Indoor Application | Follow temperature rules | May not hold up in extreme outdoor heat |
| High-Temperature Surfaces | Use special polyester materials | Can handle heat up to 302°F |
| Submersion Applications | Use decals with strong adhesives | Works underwater and resists chemicals and UV rays |
By following these steps, your window decals will look fantastic and stay in place for a long time. Whether you pick the dry or wet method, being careful and patient will give you the best results.
Removing the Transfer Tape
Once your decal is in place, it’s time to remove the transfer tape. This step might seem simple, but doing it the right way ensures your decal looks flawless and stays put.
Wait for the decal to adhere fully
Patience is key here. After applying the decal, give it time to stick properly to the window. The adhesive needs a little while to bond with the surface. Rushing this step could cause the decal to lift or shift when you remove the tape.
For the best results, wait at least 15-30 minutes before peeling off the transfer tape. If the weather is cooler, you might need to wait a bit longer. A warm environment helps the adhesive cure faster. If you’re in a hurry, you can use a hairdryer on a low heat setting to speed things up. Just hold it a few inches away from the decal and move it around evenly.
Tip: Avoid touching the decal during this time. Even light pressure can weaken the adhesive bond.
Peel off the transfer tape slowly at a sharp angle
When the decal feels secure, start peeling off the transfer tape. Begin at one corner and pull it back slowly. Keep the tape at a sharp angle—almost parallel to the window. This technique reduces the risk of lifting the decal off the surface.
If you notice any part of the decal sticking to the tape instead of the window, stop immediately. Press that section back down with your fingers or a squeegee, then continue peeling. Going slow is the trick here. It gives you more control and prevents mistakes.
For stubborn spots, a little heat can work wonders. Use a hairdryer or a heat gun on a low setting to soften the adhesive. This makes the tape easier to remove without damaging the decal. If there’s any sticky residue left behind, gently clean it with a microfiber cloth and rubbing alcohol.
Here are some additional tips to make tape removal easier:
- Use heat: Warm up the tape to loosen the adhesive.
- Add moisture: Combine heat with a damp cloth to soften the tape further.
- Scrape gently: If residue remains, use a soft tool like a crepe square to clean it off.
Pro Tip: Always test heat or cleaning methods on a small area first to avoid damaging the decal or window.
By taking your time and following these steps, you’ll end up with a perfectly applied decal that looks professional and lasts for years.
Finishing Touches
Inspecting the Decal
Once your decal is applied, take a moment to inspect it closely. This step ensures everything looks perfect and professional.
Check for air bubbles or imperfections
Look over the decal for any air bubbles or uneven spots. If you spot a bubble, don’t panic. Use a squeegee or a credit card wrapped in a soft cloth to gently push the bubble toward the edge. For stubborn bubbles, a small pin can help. Poke the bubble lightly to release the trapped air, then smooth it out.
Tip: Always work slowly and carefully to avoid damaging the decal while fixing imperfections.
Smooth out edges if necessary
Check the edges of the decal to ensure they’re fully adhered to the window. If you notice any lifting, press them down firmly with your fingers or a squeegee. A little extra attention here can prevent peeling later on.
Allowing Time for Adhesion
Patience is key after applying your decal. The adhesive needs time to bond fully with the window surface.
Avoid washing the car or exposing it to extreme weather for 24-48 hours
For the best results, avoid washing your car or exposing it to rain, snow, or extreme heat for at least 24-48 hours. This curing period allows the adhesive to reach its full strength. If possible, park your car in a shaded or covered area during this time.
Pro Tip: Applying decals in temperatures between 60°F and 74°F helps the adhesive cure properly and reduces the risk of peeling or bubbling.
Maintaining Your Window Decals
Proper maintenance keeps your decals looking vibrant and intact for years.
Clean gently with mild soap and a soft cloth
When it’s time to clean your car, use a soft cloth or sponge with mild soap and water. Gently wipe the decal to remove dirt and grime. Avoid scrubbing too hard, as this can damage the design.
Avoid abrasive cleaners or tools
Stay away from abrasive cleaners, brushes, or automatic car washes. These can scratch or peel the decal. High-quality decals are designed to withstand weather and UV rays, but harsh cleaning methods can still shorten their lifespan.
Modern decals often come with UV-resistant and waterproof layers. These features protect them from fading in sunlight and peeling in rain or snow, ensuring they stay vibrant and durable.
By following these steps, you’ll keep your window decals looking sharp and professional. A little care goes a long way in preserving their appearance and effectiveness.
Putting on window decals is easy with the right steps. Use good tools, prepare carefully, and be patient for the best results. Strong materials and proper methods help decals last longer, even in bad weather. Choosing reliable makers ensures your decals look great and work well.
Keep your decals clean by washing them softly. Avoid rough conditions in the first few days. If you take care of them, they’ll stay bright and noticeable for years. Whether for fun or business, your hard work will shine every time someone sees your car.
FAQ
How do I remove old decals from my car window?
Use a hairdryer to heat the decal for a few seconds. Peel it off slowly with your fingers or a plastic scraper. If sticky residue remains, clean it with rubbing alcohol and a microfiber cloth.
Can I apply decals in cold weather?
It’s better to wait for warmer temperatures. Decals stick best between 60°F and 74°F. If it’s cold, use a hairdryer to warm the window before applying. This helps the adhesive bond properly.
What’s the difference between dry and wet application?
Dry application sticks the decal directly to the window. Wet application uses soapy water to adjust the decal before it adheres. Wet is great for large decals, while dry works well for smaller designs.
How do I fix air bubbles under the decal?
Push bubbles toward the edges with a squeegee or credit card wrapped in cloth. For stubborn bubbles, poke them gently with a pin to release the air, then smooth them out.
Can I reuse a decal after removing it?
Most decals aren’t reusable. Once removed, the adhesive weakens, and the design may stretch or tear. If you need a temporary option, choose removable decals designed for short-term use.
How long should I wait before washing my car?
Wait 24-48 hours after applying the decal. This gives the adhesive time to bond fully. Washing too soon can weaken the adhesive and cause peeling.
Are decals safe for tinted windows?
Yes, decals work on tinted windows. Just make sure the surface is clean and dry before applying. Avoid using harsh cleaners that could damage the tint.
What’s the best way to clean decals?
Use mild soap and water with a soft cloth. Gently wipe the decal to remove dirt. Avoid abrasive cleaners or tools, as they can scratch or peel the design.
Would you like to get your own custom design decals ?
Leave your info we will contact you asap