2025 Custom Motorcycle Helmet Wraps: A Step-by-Step Guide


In 2025, custom motorcycle helmet wraps are super popular. It’s clear why riders love them so much. These wraps mix style, low cost, and protection perfectly. The global helmet market is growing fast, reaching $2.79 billion this year. It’s growing at a steady rate of 6.6%. This shows more riders want to personalize their helmets.
A custom wrap lets you show off your unique style. It also protects your helmet from scratches and damage. You can pick bold designs, smooth matte looks, or bright colors. These wraps help you stand out while riding. The best part? They’re cheap and easy to replace. You can change your look anytime you want!



Key Takeaways
- Custom helmet wraps let riders show their style and protect helmets.
- Wraps are cheaper than painting, costing between $10 and $100.
- They protect helmets from scratches and keep them looking new.
- Wraps are easy to remove or change without harming the helmet.
- Good vinyl wraps last long, block UV rays, and look professional.
- Bright wraps make riders more visible, especially in dim light.
- Custom wraps can advertise teams or events for group rides.
- Always check local rules to make sure helmet wraps are allowed.
Benefits of Motorcycle Helmet Wraps
Personalization and Unique Style
A custom helmet is more than just safety gear. It shows your personality. Helmet wraps let you design a look that’s all yours. You can pick bold patterns, matte finishes, or bright colors. Match your helmet to your bike or show off your hobbies.
The best part? You don’t have to stick with boring factory designs. Custom wraps help you stand out while riding. It’s a fun way to express yourself and grab attention. If your style changes, you can easily switch wraps without spending too much.
Cost-Effective Customization
Making your helmet unique doesn’t have to be expensive. Compared to painting, helmet wraps are cheaper. Here’s a quick comparison:
- A basic paint job costs $20 to $100.
- Fancy custom paint can cost over $500.
- Vinyl wraps are affordable and last 5 to 7 years.
With wraps, you get a cool, professional look for less money. You can also change the design anytime without spending a lot. It’s a smart way to customize your helmet and save money.
Added Protection for Helmet Surfaces
Helmet wraps don’t just look cool—they protect your helmet too. The vinyl layer stops scratches, scuffs, and small damage. This keeps your helmet looking new longer.
If you ride often, you know helmets can get scratched easily. A wrap adds extra protection, so you don’t worry about damage. It also helps keep your helmet’s value high if you want to sell it later.
Many wraps also block UV rays. This stops colors from fading in the sun. You get both style and protection in one simple wrap.
Easy to Change or Remove
One of the best things about helmet wraps is how simple they are to change or take off. If you want a new look, just peel off the old wrap and put on a new one. This makes wraps great for riders who like trying out different styles.
Worried about damaging your helmet when removing a wrap? Don’t be—it won’t harm it. In fact, wraps can protect your helmet’s surface. As one expert said:
“We had to ensure wraps wouldn’t damage helmets. Actually, they protect them instead.”
Another cool thing? You don’t need special tools or help to remove a wrap. It’s easy to do at home. Whether you’re changing your design or getting ready for an event, wraps make it simple to keep your helmet looking awesome.
Durability Against Scratches and Scuffs
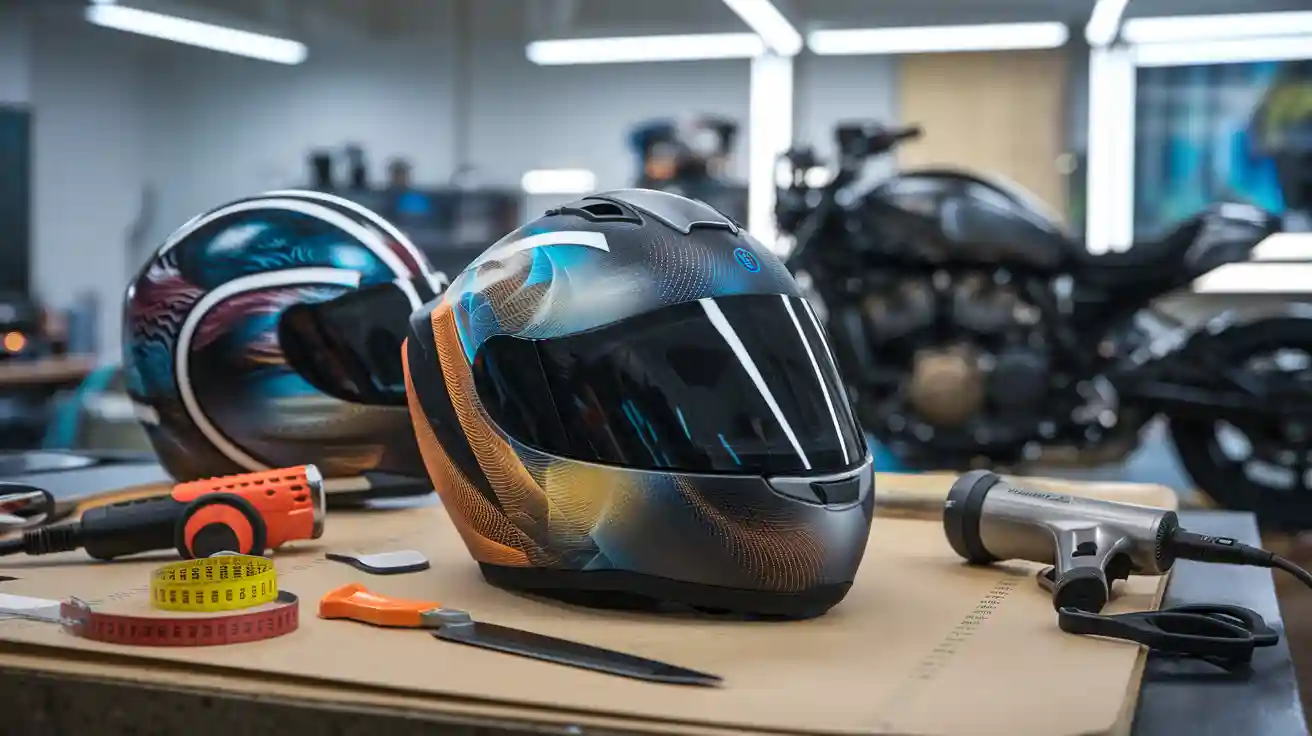
Helmet wraps aren’t just stylish—they’re strong too. The vinyl material is made to handle scratches, scuffs, and small damage. It keeps your helmet looking great for a long time.
Here’s a quick chart showing how wraps work with different helmets:
| Helmet Type | Scratch/Scuff Durability | Skid Test Performance |
|---|---|---|
| Hard Shell Helmets | High | Best for tangential impacts |
| Micro-Shell Helmets | Moderate | Best for tangential impacts |
| No-Shell Helmets | Moderate | Good for skid-type falls |
| Slip-over Nylon Covers | Low | May come off on smooth surfaces |
As shown, wraps give extra protection, especially for hard-shell helmets. This makes them a smart pick for riders who want their helmets to stay safe and look new.
Weather Resistance and UV Protection
Riding in all kinds of weather can wear out your helmet. That’s why helmet wraps are so useful. They protect against rain, wind, and heat. Wraps act like a shield, keeping your helmet safe from bad weather.
Another bonus? Many wraps block UV rays. This stops your helmet’s colors from fading in sunlight. Whether it’s sunny or rainy, a good wrap keeps your helmet bright and stylish.
If you ride a lot, getting a weather-resistant wrap is a smart idea. It’s an easy way to protect your helmet and add some personality to your gear.
Better Visibility and Safety
When riding, being seen is very important for safety. Custom helmet wraps can help make you more visible. Bright colors, shiny designs, and bold patterns help others notice you. This is especially helpful in the dark or low light. It lowers the risk of accidents by making you easier to spot.
Studies show helmets help riders judge distances better. Riders with helmets guess safe distances more accurately than those without. This skill is key when riding on busy roads or sharp turns. A helmet wrap with shiny or bright designs can make this even better. It adds an extra layer of safety.
Riding at night? Pick a wrap with shiny strips or neon colors. These designs reflect car lights, making you stand out. It’s an easy way to stay safe and look cool.
Showing Your Personality and Hobbies
Your helmet isn’t just for safety—it shows who you are. Custom wraps let you share your style and interests. Whether you like bold designs, smooth finishes, or hobby-inspired looks, wraps make it possible.
Love racing? Add a checkered flag design. Like superheroes? Wrap your helmet with their logo. You can even match your helmet to your bike. The choices are endless, and it’s all about showing your unique style.
The coolest part? You can change your wrap whenever you want. It’s like getting a new helmet without buying one. So, go ahead and show off your personality while riding.
Promoting Teams or Events
Custom wraps aren’t just for personal use—they’re great for groups too. If you’re on a racing team, wraps can show your logo, team colors, or sponsors. This gives your team a professional and cool look.
Planning a motorcycle event? Wraps can match the event’s theme or logo. They make riders feel included and give them a fun keepsake. It’s a great way to bring people together and build excitement.
Businesses can also use wraps to advertise. If you own a motorcycle company, branded wraps are a creative way to promote. Every ride becomes a chance to show off your brand. It’s a stylish and smart way to get noticed.
Protecting the Helmet’s Resale Value
Did you know that a well-maintained helmet can fetch a good price when you decide to sell it? If you’re someone who likes to upgrade your gear often, protecting your helmet’s resale value is a smart move. This is where custom motorcycle helmet wraps come in handy. They don’t just make your helmet look cool—they also act as a protective shield.
When you use a wrap, it keeps your helmet’s surface safe from scratches, scuffs, and fading. Over time, helmets can lose their shine due to regular use and exposure to sunlight. A wrap prevents this wear and tear, so your helmet stays in great condition. Buyers are more likely to pay a higher price for a helmet that looks almost new.
Another advantage of motorcycle helmet wraps is that they’re easy to remove. If you’re planning to sell your helmet, you can simply peel off the wrap to reveal the original surface underneath. This means the buyer gets a clean, unaltered helmet, which is often more appealing. Plus, the wrap ensures that the helmet’s paint and finish remain intact, adding to its value.
Here’s a quick tip: Choose a high-quality wrap with UV protection. This keeps the colors vibrant and prevents fading, even if you ride in the sun a lot. A faded helmet can look old and less attractive to buyers. By using a wrap, you’re not just protecting your helmet—you’re also making sure it looks its best when it’s time to sell.
If you’re part of a team or club, a custom helmet wrap can also boost resale value. Buyers might find a unique design more appealing, especially if it’s tied to a popular event or group. It’s a great way to make your helmet stand out in the market.
In short, investing in a wrap is like giving your helmet a long-term insurance plan. It keeps your gear looking fresh, protects it from damage, and ensures you get the best price when you decide to sell. So, if you’re thinking about upgrading your helmet in the future, start wrapping it now!
Step-by-Step Guide to Wrapping a Helmet
Preparing the Helmet
Cleaning and Removing Accessories
Before you start, make sure your helmet is clean and ready for wrapping. Dust, dirt, and grease can ruin the adhesive on the vinyl wrap, so it’s important to get rid of them. Use a soft cloth and mild soap to wipe down the surface. Avoid harsh chemicals—they can damage the helmet’s finish.
If your helmet has accessories like visors, cameras, or decals, take them off. These can get in the way during the wrapping process. Removing them also ensures the vinyl wrap sticks evenly. Don’t worry—you can reattach them once the wrap is complete.
Tip: Pay extra attention to corners and edges. Dirt tends to hide there, and it can affect how well the wrap sticks.
Smoothing the Surface
A smooth surface is key to a flawless wrap. Check your helmet for scratches, dents, or uneven spots. If you find any, sand them down gently with fine-grit sandpaper. This creates a flat surface for the vinyl wrap to adhere to.
Once you’re done sanding, wipe the helmet again to remove dust. A clean, smooth helmet makes the wrapping process easier and ensures the vinyl looks professional.
Note: If your helmet has a glossy finish, lightly sanding it can help the vinyl stick better.
Selecting and Cutting the Vinyl Wrap
Measuring for Precision
Start by measuring your helmet. Use a flexible tape measure to get the dimensions of the surface you’ll be wrapping. This helps you cut the vinyl wrap to the right size. Don’t forget to account for curves and edges—they require extra material for proper coverage.
Write down the measurements and double-check them. Precision is important here. A poorly measured wrap can lead to gaps or overlaps, which are hard to fix later.
Pro Tip: Add an extra inch to your measurements. This gives you some wiggle room when applying the wrap.
Cutting for Complex Shapes
Helmets aren’t flat, so you’ll need to cut the vinyl wrap to fit their curves. Lay the vinyl on a clean surface and use your measurements to mark the cutting lines. For tricky areas like vents or ridges, use a sharp craft knife to cut precise shapes.
Take your time with this step. Rushing can lead to uneven cuts, which will show up once the wrap is applied. If you’re unsure, practice on a scrap piece of vinyl first.
Callout: Cutting the vinyl accurately reduces waste and ensures a professional finish.
Applying the Vinyl Wrap
Using Heat for Adhesion
Heat is your best friend when applying a vinyl wrap. It makes the material flexible and helps it stick to the helmet’s surface. Use a heat gun or hairdryer to warm up the vinyl as you apply it. Start with one section and work your way around the helmet.
Press the vinyl firmly onto the surface, smoothing it out as you go. The heat helps the wrap conform to curves and edges, giving it a seamless look.
Tip: Keep the heat gun moving to avoid overheating the vinyl. Too much heat can cause it to stretch or tear.
Eliminating Air Bubbles
Air bubbles can ruin the look of your custom motorcycle helmet. To avoid them, use a squeegee or your fingers to press the vinyl down as you apply it. Start from the center and push outward toward the edges.
If you spot a bubble after the wrap is applied, don’t panic. Use a pin to pop it, then press the vinyl down gently. This fixes the issue without damaging the wrap.
Quick Tip: Work slowly and methodically. Rushing increases the chances of air bubbles forming.
Evidence Integration:
Here’s how efficient methods improve the vinyl wrap application process:
| Metric | Benchmark | Impact |
|---|---|---|
| On-Time Project Completion | 85%-95% | Enhances customer satisfaction and repeat business |
| Bottleneck Identification | Reduce delays by 20%-30% | Improved resource allocation and efficiency |
| Material Usage Rate | 95% | Ensures efficient resource allocation and minimizes waste |
| Waste Reduction | 20% Reduction | Drives down costs and improves profit margins |
These benchmarks highlight how careful preparation and precise application can save time, reduce waste, and deliver high-quality results.
Finalizing the Wrap
Trimming Excess Material
Once the vinyl wrap is applied, it’s time to trim the extra material. This step is crucial for a clean and professional finish. Grab a sharp craft knife or precision blade. Carefully cut along the edges of your helmet. Follow the natural lines and curves to ensure the wrap fits perfectly.
Pay close attention to areas around vents, visors, and other accessories. These spots can be tricky, but taking your time will make a big difference. Use steady hands and small, controlled cuts. If you rush, you might accidentally cut too much or damage the wrap.
Tip: Keep the blade at a slight angle while cutting. This helps you avoid cutting into the helmet’s surface.
After trimming, check for any loose edges. Press them down firmly to make sure the wrap stays in place. A well-trimmed vinyl wrap not only looks great but also lasts longer.
Sealing for Durability
Sealing the edges of your vinyl wrap is the final step. This ensures the wrap stays secure and doesn’t peel over time. Use a heat gun or hairdryer to gently warm the edges. The heat activates the adhesive, helping it bond tightly to the helmet.
As you apply heat, press the edges down with a squeegee or your fingers. Work slowly and make sure every part is sealed. This step is especially important for areas exposed to wind and weather, like the front and sides of the helmet.
For extra durability, consider using an edge sealer. This product adds a protective layer to the edges, preventing them from lifting. It’s a small investment that can make your vinyl wrap last even longer.
Note: Don’t skip this step! Proper sealing keeps your wrap looking fresh and prevents wear and tear.
Once you’ve sealed the wrap, give your helmet a final inspection. Look for any bubbles, wrinkles, or loose spots. Fix them now to avoid problems later. With the wrap fully applied and sealed, your helmet is ready to hit the road in style!
Choosing the Right Vinyl Wrap
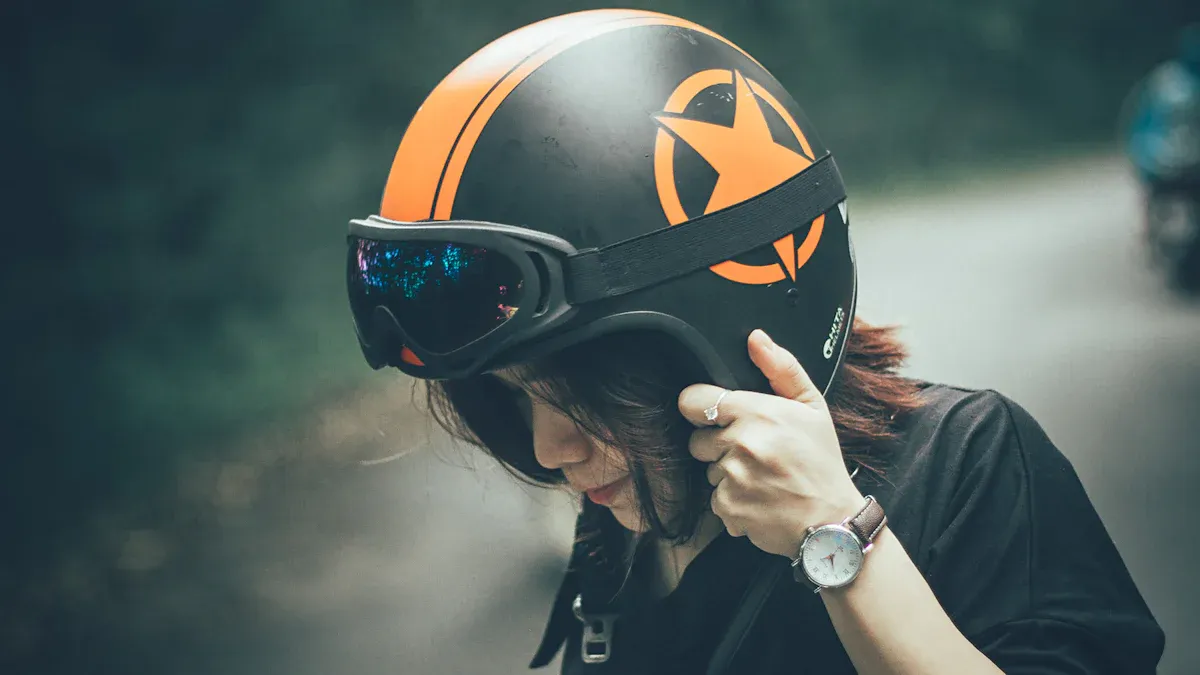
Picking the right vinyl wrap for your helmet can seem tricky. But don’t worry! Let’s make it simple so you can find the best one for your style and needs.
Types of Vinyl Wraps
Glossy, Matte, and Specialty Finishes
Vinyl wraps come in different finishes, each giving a unique look. Glossy wraps are shiny and reflect light, making them stand out. They’re strong but may show scratches more easily. Matte wraps have a smooth, non-shiny finish. They look sleek but might show dirt faster.
Want something extra cool? Specialty wraps like metallic, satin, or carbon fiber textures are available. These often have extra layers to protect against UV rays and scratches. Whether you want a bold design or a simple look, there’s a wrap for you.
Tip: Think about where you ride. Glossy wraps shine in sunlight, while matte or satin wraps work well anywhere.
Quality Factors to Consider
Durability and Thickness
Not all vinyl wraps are the same. The thickness and quality of the wrap affect how long it lasts. A good wrap can last 5 to 7 years if cared for properly. Thicker wraps are tougher and better at handling scratches or small impacts.
How you apply the wrap also matters. A poorly applied wrap won’t last long, even if it’s high-quality. Take your time or hire a pro for the best results.
UV and Weather Resistance
Your helmet faces sun, rain, and humidity. That’s why you need a wrap with strong UV and weather protection. Sunlight can fade colors, but UV-resistant wraps keep them bright.
If you ride in tough weather, add a clear coat for extra safety. This small step helps your wrap last longer. Wraps made for harsh conditions are worth it if you want your helmet to stay looking great.
- Key Points to Remember:
- Sunlight can fade wraps over time.
- Tough weather needs extra protection.
- UV-resistant wraps keep colors bright longer.
Recommended Vinyl Wrap Brands
Choosing trusted brands is a smart way to find the best wrap. Brands like 3M, Avery Dennison, and Oracal are known for quality. They offer many finishes and colors, so you’ll find one that fits your style.
3M wraps are durable and easy to apply. Avery Dennison wraps stretch well, making them great for helmets. Oracal offers affordable options without losing quality.
Pro Tip: Read reviews before buying. Research helps you avoid bad products and find the perfect wrap for your helmet.
Adhesive Properties and Application Ease
Picking a vinyl wrap that sticks well is important. The adhesive should hold tightly but not harm your helmet when removed. A strong adhesive makes the wrapping process smooth and hassle-free. You don’t want edges peeling or sticky leftovers later.
Some wraps have air-release technology. This feature helps prevent air bubbles during application. It makes the process quicker and gives your helmet a neat look. If you’re new to wrapping, choose wraps marked as “beginner-friendly.” These are easier to use and allow small mistakes.
Tip: Try a small piece of the wrap on your helmet first. This checks the adhesive strength and ensures it won’t damage the surface.
Cost vs. Quality Considerations
Vinyl wraps come in different qualities, and price often shows their value. Cheap wraps might fade fast or peel after a few rides. Spending more on a good wrap saves money over time. High-quality wraps last longer, look better, and protect your helmet well.
Here’s what to expect at different price levels:
- Budget Wraps: Low cost but may not last long or block UV rays.
- Mid-Range Wraps: Good balance of price and quality with decent durability.
- Premium Wraps: Expensive but offer bright colors, strong durability, and features like air-release technology.
Think about how often you ride and the weather you face. If you ride daily, a durable wrap is worth the cost. For occasional rides, a mid-range wrap might work fine.
Pro Tip: Read reviews before buying. Research helps you find the best wrap for your money.
Choosing Between Cast and Calendared Vinyl
There are two main types of vinyl wraps: cast and calendared. Knowing the difference helps you pick the right one.
Cast vinyl is thin, flexible, and great for curved surfaces like helmets. It stretches easily and doesn’t tear. It also lasts longer and resists fading, making it perfect for long-term use. If you want a wrap that looks professional and lasts, choose cast vinyl.
Calendared vinyl is thicker and less bendable. It works better on flat or slightly curved surfaces. It’s cheaper than cast vinyl but doesn’t perform well on helmets with many curves. Over time, it may shrink or peel, especially in tough weather.
Key Takeaway: Cast vinyl is the best choice for helmets. It costs more but is easier to apply and lasts longer.
The Importance of Stretchability for Complex Surfaces
Wrapping a helmet is tricky because of its curves and edges. A vinyl wrap that stretches well makes this job easier. It fits the helmet’s shape smoothly, giving it a neat look.
Good wraps stretch without ripping, making them simple to apply. They also prevent wrinkles and bubbles, saving time and material.
Tip: Heat helps wraps stretch better. Use a heat gun to soften the vinyl. This makes it easier to cover tight spots and sharp corners.
Note: Test the wrap before using it. Stretch it gently to check if it tears or loses shape. If it does, pick a better wrap for your helmet.
Selecting the Right Vinyl for Different Vehicle Types
Different vehicles need different wraps. Helmets need thin, stretchy wraps for their curved surfaces. Cars and motorcycles need thicker wraps for flat areas like hoods or tanks.
Thin wraps work best for helmets because they bend easily. Thicker wraps protect flat surfaces from scratches and bad weather.
Pro Tip: Buy wraps in bulk for multiple items. This saves money and keeps your gear looking the same.
Match the wrap’s finish to the vehicle’s style. Glossy wraps make cars shiny, while matte wraps give helmets a cool, simple look.
Brand Reputation and Manufacturer Trust
Picking a trusted brand is important for good wraps. Brands like 3M and Avery Dennison are known for strong, long-lasting wraps. Their products stretch well and resist sunlight and weather.
Check reviews before buying. Look for comments about stretchability, stickiness, and durability.
Callout: Don’t pick wraps just because they’re cheap. Low-cost wraps might peel or fade fast. Spending more on a good brand keeps your helmet safe and stylish longer.
If unsure, try a sample first. Many brands offer small pieces to test. This helps you choose the right wrap without surprises.
How to Test Vinyl Before Installation
Testing your vinyl wrap before installation is a smart move. It helps you avoid costly mistakes and ensures the wrap works perfectly for your helmet. Here’s how you can test it step by step.
1. Check the Adhesive Strength
Start by cutting a small piece of the vinyl wrap. Stick it to a clean, flat surface on your helmet. Press it down firmly and let it sit for a few minutes. Then, peel it off slowly. If it comes off easily without leaving residue, the adhesive is good to go. If it feels too sticky or leaves marks, you might want to reconsider that brand.
Tip: Test the adhesive on an inconspicuous area of your helmet to avoid visible marks.
2. Test for Stretchability
Helmets have curves and edges, so the vinyl wrap needs to stretch well. Take another small piece and gently pull it while applying heat with a hairdryer or heat gun. A good wrap stretches smoothly without tearing or losing its color. If it rips or wrinkles, it might not be suitable for complex surfaces like helmets.
3. Assess Color and Finish
The color and finish of the vinyl wrap can look different once applied. Stick a small piece on your helmet and step outside to see how it looks in natural light. This helps you check if the color matches your expectations. Glossy wraps might reflect more light, while matte wraps give a subtle, smooth look.
4. Evaluate Air-Release Technology
Air bubbles can ruin the look of your helmet. To test for air-release technology, apply a small piece of the vinyl wrap and press it down with your fingers. If you can easily push out any bubbles, the wrap has good air-release properties. This feature makes the installation process much easier.
5. Confirm Weather Resistance
Your helmet faces all kinds of weather, so the vinyl wrap needs to hold up. Stick a test piece on your helmet and expose it to sunlight, rain, or even a quick splash of water. Check if the wrap stays in place and doesn’t fade or peel. A weather-resistant wrap will keep your helmet looking great for years.
Note: Always follow the manufacturer’s instructions for testing. This ensures accurate results and helps you avoid damaging the wrap.
By testing your vinyl wrap before installation, you save time and effort. You also ensure your helmet gets a flawless, long-lasting finish. So, don’t skip this step—it’s worth it!
Costs and Budgeting for Motorcycle Helmet Wraps
When it comes to customizing motorcycle helmets, understanding the costs involved is essential. Whether you’re planning to do it yourself or hire a professional, knowing what to expect can help you budget wisely. Let’s break it down step by step.
DIY Costs
Tools and Materials Breakdown
If you’re thinking about wrapping your helmet yourself, you’ll need a few tools and materials. Don’t worry—it’s not a long list, and most items are easy to find. Here’s what you’ll need:
- Vinyl Wrap: The main material for your custom helmet wrap.
- Heat Gun or Hairdryer: Helps the vinyl stretch and stick to the helmet.
- Squeegee or Credit Card: Used to smooth out the vinyl and remove air bubbles.
- Craft Knife or Precision Blade: For trimming excess vinyl.
- Cleaning Supplies: Mild soap, water, and a soft cloth to prep the helmet.
You might already have some of these tools at home. If not, you can find them at hardware stores or online. A heat gun, for example, costs around $20 to $30, while a basic squeegee is under $10. These tools are reusable, so they’re a one-time investment.
Average Vinyl Wrap Prices
The cost of vinyl wraps varies depending on the quality and brand. On average, you can expect to pay:
- Budget Wraps: $10 to $20 per roll. These are thinner and may not last as long.
- Mid-Range Wraps: $25 to $50 per roll. A good balance of price and quality.
- Premium Wraps: $60 to $100 per roll. These offer better durability, UV protection, and vibrant colors.
For a single helmet, you’ll need about 2 to 3 square feet of vinyl. This means even a premium wrap won’t break the bank. DIY wrapping is a cost-effective way to give your helmet a fresh, custom look.
Tip: Always buy a little extra vinyl. Mistakes happen, and having spare material can save you a trip back to the store.
Professional Wrapping Services
Typical Pricing for Professionals
If you prefer to leave the job to the experts, professional wrapping services are a great option. The cost depends on the complexity of the design and the quality of the vinyl. While exact prices for helmet wrapping aren’t always listed, here’s a general idea based on market research:
| Service Type | Average Price (UK) |
|---|---|
| Car Wrapping | Varies by vehicle |
| Helmet Wrapping | Not explicitly stated |
In the U.S., helmet wrapping services typically range from $50 to $150. Simple designs cost less, while intricate patterns or specialty finishes can push the price higher.
Factors Influencing Costs
Several factors can affect the cost of professional helmet wrapping:
- Design Complexity: A plain color wrap costs less than a detailed graphic or custom logo.
- Vinyl Quality: Premium wraps with UV protection and durability features are more expensive.
- Labor Costs: Skilled professionals charge more for their expertise, but the results are worth it.
- Location: Prices vary by region. Urban areas often have higher rates than smaller towns.
Pro Tip: Ask for a detailed quote before committing to a service. This helps you avoid hidden fees and ensures you know exactly what you’re paying for.
Comparing DIY vs. Professional Services
So, should you wrap your helmet yourself or hire a pro? It depends on your budget, skills, and how much time you’re willing to invest. Let’s compare the two options:
- DIY Wrapping:
- Pros: Cheaper, flexible timing, and a fun project if you enjoy hands-on work.
- Cons: Requires patience and practice. Mistakes can be costly if you waste vinyl.
- Professional Wrapping:
- Pros: High-quality results, no stress, and access to advanced tools and techniques.
- Cons: More expensive and may take longer due to scheduling.
If you’re confident in your skills and want to save money, DIY is the way to go. But if you want a flawless finish or a complex design, hiring a professional is worth the investment.
Callout: Think about how often you’ll use your custom motorcycle helmet. For daily riders, a professional wrap might last longer and offer better protection.
Common Mistakes and How to Avoid Them
Preventing Air Bubbles and Wrinkles
Air bubbles and wrinkles can ruin the look of your helmet wrap. They’re frustrating, but you can avoid them with a few simple tricks. First, start by applying the vinyl wrap slowly. Rushing leads to uneven surfaces and trapped air. Use a squeegee or your fingers to press the vinyl down as you go. Work from the center outward to push air bubbles toward the edges.
Heat is your best friend here. A hair dryer or heat gun can soften the vinyl, making it easier to stretch and stick. Warm the vinyl gently before applying it to curved areas. This helps the material relax and reduces wrinkles.
Tip: Keep the heat gun moving. Holding it in one spot can overheat the vinyl and cause distortion.
If you spot a bubble after applying the wrap, don’t panic. Use a pin to pop it, then press the vinyl down gently. Wrinkles? Lift the vinyl slightly, warm it again, and smooth it out. These quick fixes save you from starting over.
Avoiding Scratches During Application
Scratches can happen if you’re not careful during the wrapping process. They don’t just affect the vinyl—they can damage your helmet too. To avoid this, always clean your helmet before starting. Dirt and debris can scratch the surface when you press the vinyl down.
Use tools with soft edges. A squeegee with a felt tip works better than a hard plastic one. It smooths the vinyl without leaving marks. If you’re using a craft knife to trim the wrap, keep the blade sharp. A dull knife can tear the vinyl and scratch the helmet.
Callout: High-quality vinyl wraps are less prone to scratches. Cheaper options might tear easily, so investing in good material pays off.
Be mindful of your workspace. A cluttered area increases the risk of accidents. Lay the helmet on a soft cloth or mat to protect it while you work. These small steps make a big difference in keeping your helmet scratch-free.
Ensuring Proper Surface Preparation
A clean and smooth surface is the foundation of a flawless wrap. Skipping this step leads to peeling, uneven adhesion, and wasted material. Start by cleaning your helmet with mild soap and water. Avoid harsh chemicals—they can damage the finish.
Remove accessories like visors or cameras. These can get in the way and make the wrap harder to apply. Check for scratches or dents on the helmet. Sand them down gently with fine-grit sandpaper to create a smooth surface.
Note: Pay extra attention to corners and edges. Dirt often hides there, and it can affect how well the vinyl sticks.
Once the helmet is clean and smooth, dry it completely. Moisture weakens the adhesive and causes the wrap to lift over time. Taking the time to prepare your helmet properly ensures the vinyl sticks well and looks professional.
Choosing High-Quality Vinyl
Picking the right vinyl wrap can feel overwhelming with so many options out there. But don’t worry—you can spot high-quality vinyl by focusing on a few key factors. Let’s break it down so you can make the best choice for your helmet.
1. Look for Durability
Durability is the first thing you should check. A good vinyl wrap lasts for years without peeling or fading. High-quality wraps resist scratches, scuffs, and even minor impacts. They’re built to handle the wear and tear of daily rides.
Tip: Check the product description for durability ratings. Look for wraps that promise a lifespan of 5 to 7 years.
2. Check the Thickness
Thicker vinyl wraps offer better protection for your helmet. They’re less likely to tear during application and provide a stronger shield against damage. However, don’t go overboard—too thick can make it harder to apply on curved surfaces.
| Vinyl Thickness | Best Use |
|---|---|
| Thin (2-3 mil) | Helmets with complex curves |
| Medium (4-5 mil) | General use and durability |
| Thick (6+ mil) | Flat surfaces or heavy-duty protection |
3. Test Stretchability
Stretchability is a must for helmets. High-quality vinyl wraps stretch easily without losing their shape or color. This makes them perfect for covering tricky areas like vents and edges.
Callout: If the vinyl tears when stretched, it’s not the right choice for your helmet.
4. Look for UV and Weather Resistance
Sunlight and rain can ruin a cheap vinyl wrap. High-quality wraps come with UV protection to keep colors vibrant. They also resist water and humidity, making them ideal for all-weather riders.
5. Choose Trusted Brands
Stick to brands with a solid reputation. Companies like 3M, Avery Dennison, and Oracal are known for producing top-notch vinyl wraps. Their products are reliable, durable, and easy to work with.
Pro Tip: Read customer reviews before buying. They’ll give you real-world insights into how the vinyl performs.
6. Avoid Bargain Wraps
Cheap wraps might save you money upfront, but they often peel, fade, or bubble after a few rides. Investing in a high-quality wrap pays off in the long run.
Emoji Reminder: 🛑 Don’t sacrifice quality for price. A good wrap protects your helmet and looks amazing for years.
By focusing on these factors, you’ll find a vinyl wrap that’s worth every penny. Your helmet deserves the best—choose wisely!
Legal and Safety Considerations for Helmet Wraps
Rules About Helmet Changes
Before wrapping your helmet, check the rules in your area. Some places have strict laws about changing helmets. These rules make sure helmets stay safe and work properly.
In the U.S., the Department of Transportation (DOT) has helmet safety rules. If your wrap hides safety labels or changes the helmet’s shape, it might not follow these rules. In Europe, helmets must meet ECE safety standards too.
Tip: Check local helmet laws before wrapping. This helps you avoid fines.
Some places may not allow certain wraps, like shiny or metallic ones. These wraps can make it hard for others to see clearly. Always double-check the rules to stay out of trouble.
Keeping Helmets Safe
Helmets are made to protect you. A wrap should not make them less safe. When wrapping, don’t cover vents, straps, or areas that absorb impact. These parts are important for safety.
Here’s a simple safety checklist:
- Keep safety labels visible: They show your helmet meets the law.
- Avoid heavy wraps: Extra weight can make helmets unbalanced.
- Fix peeling edges: Loose wraps can distract you while riding.
Callout: If wrapping damages your helmet, stop and fix it.
A bad wrap can weaken your helmet. This makes it less safe in accidents. Always put safety first when customizing your helmet.
Reflective and Bright Wraps
Being seen is very important when riding, especially at night. Many places require helmets to have reflective parts. These help drivers notice you on the road.
Choose wraps with reflective strips or bright colors. Neon and shiny wraps are great for visibility. Avoid dark wraps that make you harder to see.
Pro Tip: Reflective wraps look cool and keep you safe.
Some areas have rules about how much of the helmet must be reflective. Check these rules before picking your wrap.
By following these tips, you can have a stylish helmet that’s safe and legal for riding.
Professional Services for Motorcycle Helmet Wraps
Best Companies for Custom Helmet Wraps
If you want a professional helmet wrap, picking the right company is key. Some businesses are experts in custom wraps and have lots of experience. They know how to handle the curves of helmets and make them look perfect.
Big companies like 3M Certified Installers and Wrap Guys are trusted by riders everywhere. They use top-quality materials and advanced methods. Their designs range from bold patterns to smooth matte styles. Another great choice is Avery Dennison’s installer network. They focus on making wraps last and look amazing for years.
Local shops can also be a great option. Many smaller businesses offer personal service and unique designs. Check online reviews or ask other riders for advice. A well-reviewed company will give you confidence and a helmet that stands out.
What to Check in a Wrapping Service
Not all wrapping services are equal. Knowing what to check helps you avoid problems. First, look at their portfolio. Good companies proudly show their past work. Look for neat edges, smooth finishes, and creative designs.
Next, ask about the materials they use. High-quality vinyl lasts longer and doesn’t fade easily. Companies using trusted brands like 3M or Oracal are a safer choice. Also, ask if they offer warranties. A warranty shows they trust their own work.
Turnaround time is important too. You don’t want to wait forever for your helmet. Reliable companies finish on time without rushing. Here’s a quick industry guide:
| Metric | Benchmark | Impact |
|---|---|---|
| On-Time Project Completion | 85%-95% | Keeps customers happy and coming back |
| Bottleneck Identification | Cut delays by 20%-30% | Better use of time and resources |
| Multiple Project Handling | Over 90% on-time delivery | Faster service and scalability |
Lastly, think about customer service. A friendly team makes the process easier. They’ll answer your questions and keep you updated.
Questions to Ask Before Choosing
Before hiring a wrapping service, ask some key questions. This helps you avoid issues and get great results. Start with these:
- What’s included in the price? Some companies charge extra for special designs or finishes. Know what you’re paying for.
- How long will it take? A clear timeline helps you plan. Ask if they can do rush jobs if needed.
- Do you offer warranties? A warranty protects your money and shows they trust their work.
- What kind of vinyl do you use? High-quality vinyl, like cast vinyl, works best for helmets. Avoid cheap materials.
- Can I see your portfolio? Past work shows their skill. Look for clean and professional results.
Asking these questions helps you find the right service. A little research ensures you’ll love your new helmet wrap.
Experience and Portfolio of Previous Work
Picking a helmet wrapping service with experience is very important. Their past work shows if they can do a good job. A portfolio helps you see their skills and decide if their designs fit your style.
Ask to see pictures of helmets they’ve wrapped before. Look for neat edges, smooth finishes, and creative designs. If they’ve worked on helmets like yours, it’s a good sign. It means they know how to handle curves and tricky spots.
Tip: Check if their portfolio has many different designs. This shows they can handle custom ideas well.
Also, read reviews from other customers. Happy clients often post pictures of their helmets online. These real examples show the company’s skill and if they’re reliable.
Understanding the Installation Process
Knowing how wrapping works helps you avoid surprises. A good company will explain each step clearly. First, they clean your helmet to remove dirt and grease. This makes sure the vinyl sticks well.
Next, they measure and cut the vinyl to fit your helmet. Experts use special tools to handle curves and edges. They use heat to stretch the vinyl and remove air bubbles. This step makes the wrap look smooth and perfect.
Callout: Ask if they use air-release vinyl. It helps avoid bubbles and speeds up the process.
After applying the wrap, they trim extra vinyl and seal the edges. Sealing stops peeling and makes the wrap last longer. Some companies add a protective layer for weather safety.
If you’re curious, ask to watch them work. Seeing the process shows how much care and skill they use.
Turnaround Time and Project Deadlines
Time is important, especially if you need your helmet soon. Ask how long the wrapping will take. Most companies finish in one to three days, depending on the design.
Pro Tip: Pick a service that promises deadlines. This shows they respect your time.
Some companies offer faster services for extra money. If you’re in a rush, this can help. Just make sure the quality stays good even with a quick timeline.
Here’s a simple chart of how long wraps usually take:
| Service Type | Time Needed |
|---|---|
| Simple Designs | 1-2 days |
| Complex Graphics | 3-5 days |
| Rush Services | Same day or next day |
Always confirm the time before booking. Clear communication avoids problems later.
Cost Breakdown and Pricing Transparency
Knowing the costs before wrapping your helmet is very important. No one likes unexpected expenses, especially when it comes to money. Let’s look at the usual costs so you’re prepared.
What’s Included in the Price?
Professional services often include several things in their pricing. Here’s what you’re paying for:
- Vinyl Material: Better wraps cost more but last longer and look nicer.
- Labor: Experts charge for their time and skill.
- Design Work: Adding custom logos or graphics may increase the price.
- Extra Services: Some companies offer extras like edge sealing or protective layers.
Always ask for a full price breakdown. This helps you know what’s included and avoids surprise charges.
How Much Should You Expect to Pay?
The price of helmet wrapping depends on the design and materials. Here’s a simple guide:
| Service Type | Price Range |
|---|---|
| Simple Solid Colors | $50 – $100 |
| Custom Graphics | $100 – $200 |
| Specialty Finishes | $150 – $300 |
Tip: If a price seems way too low, it might mean poor-quality materials that won’t last.
Why Transparency Matters
Good companies explain their prices clearly. They’ll break down the costs and answer your questions. If a company avoids giving details, it’s a warning sign. Clear pricing builds trust and ensures you get what you pay for.
Warranties and Aftercare Services
A warranty is like a promise for your helmet wrap. It makes you feel secure, knowing the company supports their work. Most professional services offer warranties, but the details can differ.
What to Look for in a Warranty
Here are some important things to check:
- Duration: Warranties usually last 1 to 3 years. Longer ones show the company trusts their product.
- Coverage: Does it cover peeling, fading, or bubbling? Be sure to know what’s included.
- Conditions: Some warranties require proper care, like avoiding harsh cleaners.
Pro Tip: Keep your warranty papers safe. You’ll need them if you make a claim.
Aftercare Services
Many companies offer services to keep your wrap looking great. These can include cleaning, small repairs, or re-sealing edges. Ask about these options when choosing a service. They can help your wrap last longer and save you money over time.
Customization Options and Flexibility
One of the coolest things about helmet wraps is how customizable they are. You can create a design that’s truly your own. Whether you want bold patterns, smooth matte finishes, or something unique, the choices are endless.
How Flexible Are Your Options?
Professional services often let you:
- Pick from many colors and finishes.
- Add custom graphics, logos, or text.
- Match your helmet to your bike or gear.
Some companies even offer design help. You can share your ideas, and they’ll help make them real.
Callout: Don’t hold back! Your helmet is like a blank canvas for your creativity.
Why Customization Matters
A custom wrap isn’t just about looks. It’s a way to show your personality and stand out while riding. Plus, it makes your helmet one of a kind. Whether you ride alone or with a group, a custom design adds a special touch that’s hard to beat.
Feedback from Previous Clients and Reviews
Reading reviews from past customers can help you pick the best helmet wrapping service. Reviews show how good the company’s work is, how they treat customers, and if they’re reliable. Instead of guessing, you can learn from what others say.
Why Reviews Are Important
Reviews help you know what to expect before spending money. Positive reviews mean the company does a great job. Bad reviews warn you about problems to watch out for.
Tip: Look for reviews with details, like how well the wrap fits or how long it lasts. These are more useful than general comments like “great service.”
Where to Find Reviews
You can find reviews in many places. Here are some good options:
- Google Reviews: Check ratings and comments on business profiles.
- Social Media: Look for posts and photos from customers on Instagram or Facebook.
- Forums and Groups: Motorcycle communities often share honest opinions.
- Company Websites: Testimonials are helpful but may be carefully chosen.
Callout: Don’t trust just one source. Check several places for a full picture.
What Makes a Review Helpful?
Not all reviews are equally useful. Focus on ones that mention:
- Work Quality: Does the wrap look neat and last long?
- Customer Service: Was the staff polite and helpful?
- Timeliness: Did they finish the job on time?
- Problem Solving: How did they fix any issues?
Here’s a table to guide you:
| Review Aspect | What to Look For |
|---|---|
| Work Quality | Smooth edges, no bubbles, lasting design |
| Customer Service | Friendly team, clear answers |
| Timeliness | Finished as promised |
| Problem Solving | Quick fixes, fair solutions |
Using Reviews to Decide
After reading reviews, compare feedback from different companies. Look for patterns. If many people mention bad communication, that’s a warning. If most reviews praise the company’s attention to detail, they’re likely a good choice.
Pro Tip: If possible, ask reviewers questions about their experience. This gives you even more helpful information.
Taking time to read reviews helps you pick a service you can trust. You’ll feel confident about getting great results and good customer care.
Motorcycle helmet wraps are a great mix of style and safety. They help you customize your helmet, protect its surface, and even keep its value high. From bright patterns to simple looks, wraps make your helmet stand out.
Want to try it yourself? Wrapping your helmet can be a fun and cheap project. Not sure you can do it? Professionals can make it look perfect. Using good materials will keep your helmet looking cool and safe for a long time.
Tip: Always check safety rules and local laws before wrapping your helmet. A good wrap should look cool and keep you safe while riding.
FAQ
1. Can I wrap my helmet myself, or should I hire a professional?
You can definitely wrap your helmet yourself! It’s a fun DIY project if you have patience and the right tools. For complex designs or a flawless finish, hiring a professional is a great option.
2. How long does a vinyl wrap last on a helmet?
A high-quality vinyl wrap can last 5 to 7 years with proper care. Avoid harsh weather and clean it regularly to keep it looking fresh.
3. Will wrapping my helmet damage it?
No, wrapping won’t damage your helmet if done correctly. In fact, it protects the surface from scratches and UV rays. Just make sure to clean and prepare the helmet properly before applying the wrap.
4. Can I remove the wrap without leaving residue?
Yes, most vinyl wraps peel off cleanly without leaving sticky residue. Use a heat gun or hairdryer to soften the adhesive for easier removal.
5. Are helmet wraps legal everywhere?
Helmet wrap legality depends on your location. Some areas have rules about reflective surfaces or safety labels. Check your local laws before wrapping your helmet.
6. What’s the best vinyl wrap for helmets?
Cast vinyl is the best choice for helmets. It’s thin, flexible, and durable, making it perfect for curved surfaces. Trusted brands like 3M and Avery Dennison offer excellent options.
7. How do I clean my wrapped helmet?
Use a soft cloth, mild soap, and water to clean your wrapped helmet. Avoid harsh chemicals or abrasive materials that could damage the vinyl.
8. Can I wrap a helmet with vents or ridges?
Yes, you can! Use heat to make the vinyl flexible and carefully press it into the vents or ridges. Take your time to ensure a smooth finish.
Tip: Practice on a small section first if you’re new to wrapping. It helps you get the hang of it!