

Tesla Model Y / SUV Wrap Layouts: How to Design for Tall Panels and Big Blank Areas


Designing a wrap for your Tesla Model Y or SUV is not easy. Tall panels and big blank areas can make your car look empty if you do not plan well. You need to make the design look balanced and fill space, but do not add too much. Many owners have trouble with the large glass hatchback on the Model Y. The curved edges can trap air bubbles. You can use professional templates and preview tools to plan your design before you put it on. A Wrap Installation Inspection Checklist: 12 Things to Look For at Pickup helps you find problems early and makes sure your wrap looks perfect.
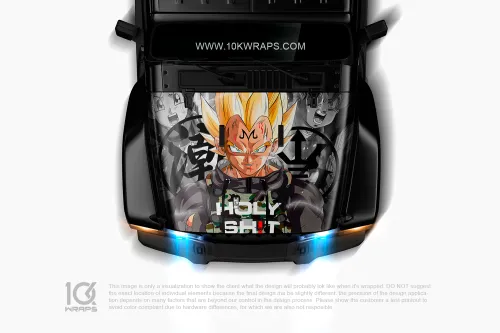
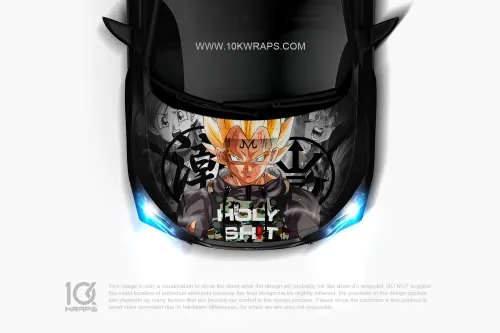

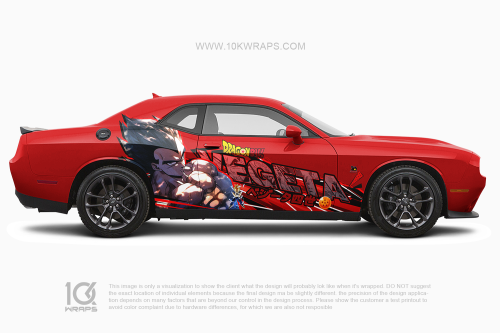
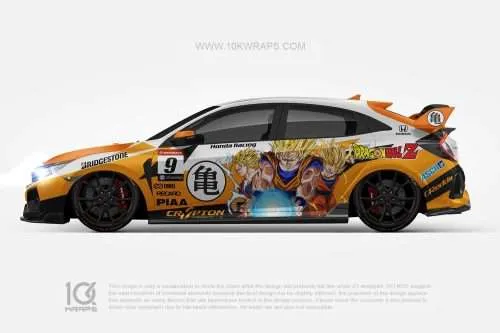


Key Takeaways
-
Think about your wrap design so you do not leave empty spots on tall panels. Add graphics or colors to fill big blank spaces but do not make it too crowded.
-
Use professional templates and preview tools to make sure your design fits the shape of your Tesla Model Y or SUV.
-
Add vertical shapes or patterns to break up big blank spaces. This makes your design more interesting and balanced.
-
Look closely at problem areas like the rear hatch and tall doors. Plan your design around these spots to stop air bubbles and stretching.
-
Use gradients and patterns to make your wrap look deeper. These can fill space and make your wrap look neat without making it messy.
-
Always clean the car’s surface very well before you put on the wrap. A clean surface helps the wrap stick better and stops bubbles.
-
Look for spots that people see easily when you place graphics. Put logos and important messages at eye level so more people notice them.
-
Use a Wrap Installation Inspection Checklist to make sure your wrap looks great when you pick up your car. This helps you find problems early.
SUV Wrap Challenges
Tall Panels and Blank Areas
You face a big challenge when you wrap a Tesla Model Y or any SUV. The panels on these vehicles stand much taller than those on sedans or coupes. You see large blank areas on the doors and rear hatch. These spaces can make your wrap look empty if you do not plan your design well. You need to fill these areas with graphics or color, but you must avoid making the design look crowded.
Tall panels give you more room to work with, but they also create more risk. If you place graphics too high or too low, people may not see them clearly. You want your design to catch attention at eye level. You should use templates to measure the space and preview your layout before you start. This step helps you avoid mistakes and makes sure your wrap looks balanced.
Tip: Use vertical elements or patterns to break up blank areas. This trick helps your design look more interesting and fills space without clutter.
Common Problem Zones
Some parts of the Tesla Model Y and other SUVs cause trouble for wrap designers. You need to watch out for these zones:
-
Rear Hatch: The large glass area and curved edges can trap air bubbles. You must plan your design to fit these shapes.
-
Tall Doors: The wide, flat panels can look empty if you do not add enough detail.
-
Roof Rails and Cladding: These features interrupt the flow of your graphics. You need to map your design around them.
-
Handles and Sensors: You must avoid placing important graphics over handles or sensors. These areas can distort your design or hide key details.
You should use a template that shows all these features. This step helps you place graphics in the right spots and avoid problem zones.
Why Standard Designs Don’t Fit
Standard wrap designs often fail on SUVs like the Tesla Model Y. Most templates fit smaller cars with shorter panels. When you use these designs on an SUV, you see gaps, stretched graphics, or empty spaces. The tall panels and wide blank areas need special layouts.
You must adjust your design for the height and shape of the SUV. You should stack graphics vertically or use large patterns to fill space. You need to anchor your main elements at eye level. You should preview your design with a mockup tool before you install the wrap.
|
Challenge |
Sedan/Coupe Wraps |
SUV/Model Y Wraps |
|---|---|---|
|
Panel Height |
Short |
Tall |
|
Blank Areas |
Small |
Large |
|
Features/Contours |
Simple |
Complex |
|
Design Fit |
Standard |
Custom |
You need to treat each SUV as a unique canvas. You must plan your layout with care and use the right tools to get a professional result.
Vertical Composition Tricks
Stacking Graphics
Stacking graphics helps you use the tall panels on your Tesla Model Y or SUV. You can place logos, text, or images in a vertical line. This method fills space from top to bottom. It draws the eye upward and makes the vehicle look taller and more dynamic.
You can use different sizes for each graphic. Place the largest element at eye level. Put smaller elements above or below. This creates a natural flow. You can also use icons or shapes to connect each part. Stacking works well for business wraps, event promotions, or creative designs.
Tip: Leave some space between each graphic. This keeps the design clean and easy to read.
Anchors and Focal Points
Anchors and focal points help guide the viewer’s attention. An anchor is a strong visual element, like a logo or bold image. Place your anchor at eye level on the door or rear panel. This makes sure people notice your main message first.
Focal points can be bright colors, unique shapes, or special effects. Use them to highlight important details. You can add a focal point near the door handle or on the rear hatch. This draws attention to key areas and breaks up large blank spaces.
-
Place anchors where people look first.
-
Use focal points to highlight your brand or message.
-
Avoid putting anchors too high or too low.
Using Gradients and Patterns
Gradients and patterns add depth and interest to large blank areas. A gradient is a smooth change from one color to another. Patterns can be stripes, dots, or custom shapes. Both tricks help fill space without making the design look crowded.
You can use a gradient to make a panel look 3D. Patterns can lead the eye across the vehicle. These effects work well on tall doors and rear hatches. They also help hide seams or small flaws in the wrap.
Here is how gradients and patterns improve your wrap:
|
Element |
Description |
Impact |
|---|---|---|
|
Smooth shifts between colors |
Adds depth and dimension |
|
|
Layered Graphics |
Overlapping visual elements |
Creates a 3D effect |
Note: Gradients and patterns make your SUV wrap look more professional. They help minimize empty space and create a balanced look.
You can combine these tricks for the best results. Try stacking graphics with a soft gradient in the background. Add a focal point with a bold pattern. This approach gives your Tesla Model Y or SUV a unique and eye-catching style.
Flowing with Vehicle Contours
When you design a wrap for your Tesla Model Y or SUV, you must pay close attention to the shape of each panel. The vehicle’s contours guide how graphics should flow. If you ignore these curves and edges, your wrap may look awkward or stretched. You want your design to move smoothly along the body lines, making the car look natural and professional.
Start by studying the main curves on the doors, fenders, and rear hatch. You can sketch your ideas on a template or use a digital mockup tool. Place your graphics so they follow the natural lines of the vehicle. This helps your design blend with the car’s shape and avoids sharp breaks or mismatched edges.
Tip: Always dry-fit your wrap elements before final installation. This step lets you spot problems early and adjust your layout for a perfect fit.
Here are some best practices for aligning your graphics with the contours of the Tesla Model Y:
|
Issue |
Solution |
|---|---|
|
Failure to dry fit the project |
Organize and dry-fit all wrap elements to anticipate and address potential issues early. |
|
Overstretching the film |
Use ‘zero stretch’ techniques and reserve heat for final touches to prevent distortion. |
|
Failure to post-heat |
Use a heat gun or torch to bring surfaces up to the correct temperature and set the film. |
|
Inaccurate or poorly-considered design |
Communicate between designers and installers to solve real-world challenges. |
|
Contaminated surfaces |
Clean all surfaces thoroughly to prevent wrap failures. |
You should always clean the panels before you start. Dirt or oil can cause the wrap to peel or bubble. Use a lint-free cloth and approved cleaner. Make sure every surface is dry and smooth.
When you apply the wrap, work slowly along the curves. Use gentle pressure and avoid stretching the film too much. If you need to use heat, do it only at the end to finish the edges. This keeps your graphics crisp and prevents warping.
-
Map your design to match the flow of the vehicle’s body lines.
-
Avoid placing key graphics over sharp bends or deep recesses.
-
Use patterns or gradients to soften transitions between panels.
If you work with a team, talk to your installer about your design. A quick discussion can save you time and trouble. You want your wrap to look great from every angle.
Note: A wrap that follows the contours of your SUV will always look more professional and last longer.
Graphic Placement Strategy
Start/Stop Points
You need to decide where your graphics begin and end on your Tesla Model Y or SUV. This choice affects how people see your wrap and how well it fits the vehicle. Professional installers focus on high-impact areas to make your design stand out. You should look at the side panels, doors, front hood, and rear windows. These spots catch the most attention, especially in traffic or parking lots.
-
Place logos and key graphics in high-visibility areas.
-
Use bold colors and fonts to make your design pop against the car’s original paint.
-
Avoid starting graphics too close to the edges or seams. This helps prevent peeling and keeps the wrap looking sharp.
You want your graphics to flow naturally across the panels. Start at eye level for maximum exposure. Stop your design before it reaches sharp curves or deep recesses. This approach keeps your wrap clean and professional.
Tip: Always preview your layout with a digital mockup before installation. This step helps you spot any awkward start or stop points.
Panel Mapping
Panel mapping helps you plan your wrap for each part of the SUV. You break down the vehicle into sections like doors, hood, roof, and bumpers. Digital mapping lets you see how your design fits on every panel. You can adjust graphics to match the shape and size of each area.
|
Aspect |
Description |
|---|---|
|
Map each section digitally, including doors, hood, roof, and bumpers. |
|
|
Precision Cutting |
Use computer-controlled cutting for an accurate fit. |
|
Seam Planning |
Position panels to minimize visible seams and fit curves and edges. |
You should use precision cutting to match the wrap to each panel. This method reduces gaps and overlaps. Seam planning helps you hide joins and keep the design smooth. You want your graphics to look seamless from every angle.
Note: Careful panel mapping makes your wrap last longer and look more professional.
Handling Features (Handles, Sensors)
Tesla Model Y and other SUVs have features that affect wrap placement. Handles, sensors, and cameras need special attention. You must avoid covering sensitive cameras and sensor systems. These parts help with driver assistance and safety. If you block them, you risk malfunctions or calibration problems.
-
Keep graphics clear of handles and sensors.
-
Plan your design around complex curves and large panels.
-
Use extra care on seamless panels to avoid visible joins.
Modern SUVs have large, smooth surfaces. You need precision to wrap these areas without gaps or overlaps. Always check the location of handles and sensors before you start. Adjust your graphics so they fit around these features.
Tip: Mark handles and sensors on your template before you print your wrap. This step helps you avoid mistakes and keeps your design looking sharp.
Avoiding Gaps and Overlaps
You want your Tesla Model Y or SUV wrap to look smooth and professional. Gaps and overlaps can ruin the effect. These problems often happen on tall panels and wide blank areas. You need to use smart techniques to keep your wrap tight and seamless.
Start with surface preparation. Clean every panel with a lint-free cloth and approved cleaner. Dirt or oil stops the vinyl from sticking. A clean surface helps the wrap stay flat and prevents bubbles.
Manage tension as you apply the film. Pull the vinyl gently and evenly. If you stretch it too much, you create gaps. If you let it bunch up, you get overlaps. Use anchor points to hold the film in place. These points help you control the flow of the material and keep it steady.
Tip: Use tension triangles by trimming away extra film in waste areas. This trick lets you pull the wrap tight without causing wrinkles or bulges.
Relief cuts help you avoid tension build-up. Make small cuts in hidden regions, like under trim or behind panels. These cuts let the vinyl relax and fit around curves. You keep the visible areas smooth and free of gaps.
Apply the wrap in a sequence. Work from one section to the next. This method helps you manage complex shapes and large panels. You avoid rushing and keep each area neat.
Post-heating the film is important. Use a heat gun to warm the vinyl after you finish applying it. The heat makes the film more pliable and helps it settle into place. You get a smooth finish that lasts longer.
Here is a quick checklist to help you avoid gaps and overlaps:
-
Clean all surfaces before you start.
-
Use anchor points to control the vinyl.
-
Trim excess film to create tension triangles.
-
Make relief cuts in hidden spots.
-
Apply the wrap in a logical sequence.
-
Post-heat the film for a smooth finish.
|
Technique |
Purpose |
Benefit |
|---|---|---|
|
Surface Preparation |
Removes dirt and oil |
Better adhesion |
|
Tension Management |
Controls film stretch |
Prevents gaps and overlaps |
|
Anchor Points |
Holds film steady |
Smooth application |
|
Tension Triangles |
Removes excess material |
Reduces wrinkles |
|
Relief Cuts |
Releases tension in vinyl |
Fits curves and edges |
|
Sequential Application |
Organizes workflow |
Handles complex areas |
|
Post-Heating |
Softens and sets film |
Lasting, smooth finish |
You can use these techniques on every panel of your SUV. You get a wrap that looks clean and professional. You avoid common mistakes and make your Tesla Model Y stand out.
Rear Hatch Design
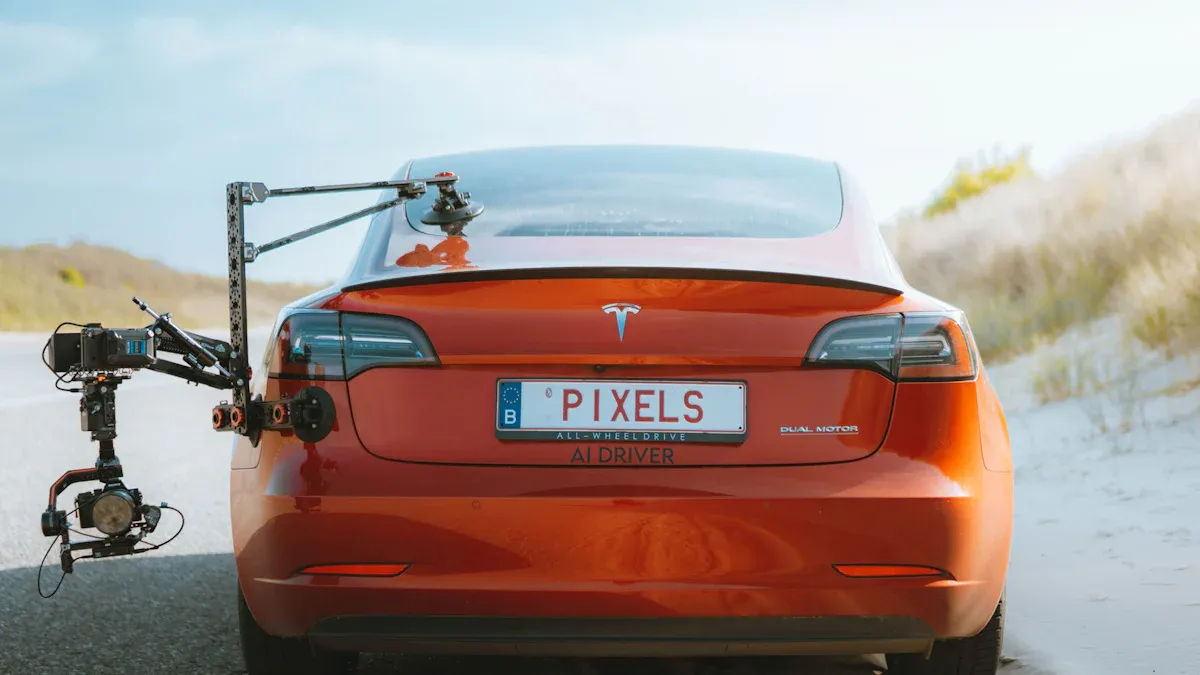
The rear hatch of your Tesla Model Y or SUV stands out as a key visual area. People often see this part first when you drive or park. You want your wrap to make a strong impression here. The rear hatch gives you a large, flat space, but it also has curves and edges that need special care.
Focal Area Techniques
You can turn the rear hatch into the main focal point of your wrap. Start by placing your logo, slogan, or main graphic in the center. This spot draws the eye and makes your message clear. Use bold colors or unique patterns to help your design stand out. If you want to add extra detail, try using a gradient or a subtle pattern in the background. This fills the space without making it look crowded.
-
Place your most important graphic at eye level.
-
Use bright colors or high-contrast designs for better visibility.
-
Keep the area around your main graphic simple to avoid distractions.
Tip: A clean, bold design on the rear hatch helps people remember your brand or message.
Integrating with Side Panels
You want your wrap to look seamless from the rear hatch to the side panels. Plan your design so that lines, colors, or patterns flow smoothly around the corners. Use a template to map out how your graphics will connect. This step helps you avoid awkward breaks or mismatched edges.
-
Extend stripes, shapes, or gradients from the rear hatch onto the sides.
-
Match colors and patterns at the edges for a unified look.
-
Preview your design with a digital mockup to check for smooth transitions.
A table can help you remember key steps for integration:
|
Step |
Purpose |
|---|---|
|
Use Templates |
Plan connections |
|
Match Colors |
Keep design unified |
|
Preview Mockups |
Spot issues before printing |
Note: Good integration makes your wrap look like one continuous piece, not separate stickers.
Handling Curves and Edges
Curves and edges on the rear hatch can make wrapping tricky. You need to use the right techniques to get a smooth, bubble-free finish. Start in the center of the curve and work outward. This helps you spread tension evenly. Gently warm the vinyl with a heat gun to make it flexible, but do not overheat it. If you see wrinkles, lift the vinyl, apply a little heat, and smooth it out.
When you reach the edges, press the vinyl into the gaps between panels. Use a squeegee to remove air bubbles and secure the wrap. For corners, cut the vinyl with a sharp blade for a clean edge. Heat the vinyl, then tuck and fold it around the corner, pressing firmly to hold it in place.
-
Start in the center and work outward on curves.
-
Use heat to make the vinyl flexible.
-
Press, lift, and smooth as needed for a perfect fit.
-
Trim and tuck edges for a clean, professional look.
Alert: Take your time on curves and edges. Rushing can lead to bubbles or peeling.
With these strategies, you can make the rear hatch of your Tesla Model Y or SUV the highlight of your wrap. A well-designed rear hatch grabs attention and ties your whole design together.
Wrap Installation Inspection Checklist
12 Things to Look For at Pickup
You want your Tesla Model Y or SUV wrap to look great when you pick it up. Use this Wrap Installation Inspection Checklist: 12 Things to Look For at Pickup to help you get the best results. Check each thing before you leave the shop.
-
Surface Cleanliness
Look for dust, dirt, or grease under the wrap. The surface should feel smooth and clean. -
No Air Bubbles
Run your hand over the panels. You should not feel any bubbles or raised spots. -
No Wrinkles or Creases
Check corners and curves. The wrap should lay flat without folds. -
Edge Sealing
Look at the edges of each panel. The vinyl should stick down tight with no lifting. -
Seam Alignment
Look where panels meet. Graphics and patterns should line up with no gaps. -
No Overstretching
The wrap should not look thin or faded. Colors should stay even across all panels. -
Proper Coverage
Make sure all painted surfaces are covered. No original paint should show through. -
Handle and Sensor Clearance
Handles, sensors, and cameras should not be blocked or wrapped over. -
No Cuts or Tears
Check for any small cuts, nicks, or tears in the vinyl. -
Consistent Finish
The wrap should look even and smooth, with no shiny or dull patches. -
No Gaps or Overlaps
Panels should meet cleanly with no visible gaps or extra layers. -
Post-Heating
Ask if the installer used heat to set the wrap. This step helps the vinyl last longer.
Use this Wrap Installation Inspection Checklist: 12 Things to Look For at Pickup every time you get a new wrap. You will find problems early and save time and money.
Template Use and Visualization
Templates and visualization tools help you get a perfect fit for your SUV wrap. Always ask your installer if they used a template made for your exact vehicle. This step makes sure the graphics fit every curve and panel.
Experienced installers always start with templates made for your exact make, model, and year. With these templates, you can plan every detail. This makes sure your graphics fit right and look like they belong. Working with mock-ups lets you see the finished look and make changes early. This way, important details do not get lost in a door seam or wrapped around a window.
You can see how templates work for different vehicles in the table below:
|
Vehicle Type |
Application of Templates |
|---|---|
|
Dodge Ram Promasters |
Quickly worked up a proof for the new wraps using existing artwork and the correct template for approval. |
|
Custom Vehicles |
Created custom templates using accurate measurements and scaled images to design and fit graphics effectively. |
When you use a Wrap Installation Inspection Checklist: 12 Things to Look For at Pickup, ask to see the digital mockup. This preview lets you compare the final wrap to the plan. You can spot mistakes before you leave the shop.
-
Ask for a template preview before installation.
-
Check that all graphics match the mockup.
-
Make sure important details do not land on seams or curves.
Common Mistakes to Avoid
You want your wrap to last and look good. Avoid these common mistakes by using the Wrap Installation Inspection Checklist: 12 Things to Look For at Pickup.
One big mistake during SUV wrap installs is not cleaning the surface well. Any dirt, grease, or debris can make the wrap bubble or peel. It is important to clean the surface very well before installation.
Here are more mistakes to watch for:
-
Not cleaning the surface enough: Clean the surface well to avoid bubbles and peeling.
-
Stretching the vinyl too much: Use the right techniques to avoid thinning and lines.
-
Not using enough heat: Always use a heat gun to help the wrap stick and look smooth.
-
Rushing the installation: Take your time and follow instructions carefully.
You can see how to prevent these mistakes in the table below:
|
Common Mistakes |
Consequences |
Prevention |
|---|---|---|
|
Premature washing |
Adhesive compromise |
Wait 24-48 hours |
|
Using harsh chemicals |
Surface damage |
Mild soap and soft cloths |
|
Exposing to extreme temperatures |
Affects adhesive properties |
Avoid direct sunlight and extreme temperatures |
Always use the Wrap Installation Inspection Checklist: 12 Things to Look For at Pickup to check for these mistakes. You will protect your investment and keep your SUV looking sharp.
If you follow these steps, you will leave the shop with a wrap that looks professional and lasts for years.
SUV Placement Checklist & CTA
Essential Layout Steps
You want your Tesla Model Y or SUV wrap to look professional and last a long time. Follow these essential layout steps to get the best results:
-
Clean Every Surface
Use isopropyl alcohol and pH-neutral cleaners. Remove all dust, grease, and dirt before you start. -
Use High-Quality Paint Protection Film
Choose a film that protects your paint and gives a matte or glossy finish. -
Gather Application Tools
Prepare squeegees, spray bottles, and microfiber cloths. These tools help you apply the wrap smoothly. -
Plan for Precision and Seamless Finish
Map out each panel. Make sure graphics line up and seams are hidden. -
Handle Complex Shapes Carefully
Use a heat gun or hairdryer to fit the wrap around tight corners and curves. This step helps you avoid bubbles and misalignment. -
Check for Durability
Inspect the wrap for strong adhesion and smooth edges. A well-installed wrap lasts longer.
Tip: Work slowly and check each step. Rushing can lead to mistakes and a poor finish.
Mockup Offer for SUV Wraps
A digital mockup helps you see your design before installation. You can preview colors, graphics, and placement on your exact vehicle model. This step lets you make changes early and avoid surprises.
|
Benefit |
Description |
|---|---|
|
Visual Preview |
See your wrap design on a Model Y or SUV |
|
Adjust colors, logos, and patterns easily |
|
|
Error Prevention |
Spot issues before printing or installation |
You can request a custom SUV wrap mockup. This service gives you confidence in your design and helps you communicate with installers. You get a professional result that matches your vision.
Call to Action: Request your SUV wrap mockup today and start planning a standout design for your Tesla Model Y or SUV.
DIY Kits and Video Guides
DIY wrap kits give you the freedom to customize your SUV at home. You choose unique colors and finishes that factory paint cannot offer. Vinyl wraps cost less than repainting and let you experiment with styles. You can install the wrap at your own pace and remove it easily if you want a new look.
-
Customization: Pick colors and patterns that show your style.
-
Convenience: Install the wrap when you have time.
-
Cost-Effective: Save money compared to professional painting.
-
Reversibility: Change your wrap whenever you want.
Video guides help you learn each step. You watch experts use tools and techniques for a smooth finish. These guides show you how to clean surfaces, apply film, and handle corners. You get clear instructions and tips for a successful DIY project.
Note: DIY kits and video guides make wrapping your Tesla Model Y or SUV easy and fun. You get a fresh look and protect your paint at the same time.
Real-World Inspiration
Successful Model Y/SUV Wraps
You can find many Tesla Model Y and SUV wraps that stand out on the road. Some owners choose bold colors like matte blue or satin red. Others use creative patterns, such as geometric shapes or camouflage. These wraps turn blank panels into eye-catching displays. You see wraps with company logos stacked vertically on the doors. Some wraps use gradients that flow from the hood to the rear hatch. These designs show how you can use tall panels and large spaces to your advantage.
Here are features that make these wraps successful:
-
Bright colors that attract attention.
-
Graphics placed at eye level for easy viewing.
-
Patterns that follow the curves of the vehicle.
-
Seamless transitions between panels.
Tip: Look for wraps that use vertical stacking and anchors. These tricks help fill tall panels and create a balanced look.
Before-and-After Comparisons
Before you wrap your SUV, the panels may look plain or empty. After a professional wrap, the vehicle transforms. You see a big difference in style and impact. The wrap covers blank areas with color and graphics. It hides small scratches and protects the paint. You notice how the design flows across the doors and rear hatch.
|
Before Wrap |
After Wrap |
|---|---|
|
Plain paint |
Custom colors and finish |
|
Visible scratches |
Protected surfaces |
|
Empty panels |
Filled with graphics |
|
No branding |
Logos and patterns |
You can take photos before and after the wrap. This helps you see the change and share your results. Many owners say their wrapped SUVs get more attention and look unique.
Lessons from Installers
Professional installers learn many lessons from wrapping Tesla Model Y and SUVs. You can benefit from their experience. Here are important points they share:
-
Rushing the process leads to mistakes. Take your time with each step.
-
Cleaning the surface is essential. Dirt or grease causes bubbles and poor adhesion.
-
Stretching the wrap too much can tear the vinyl. Stretch carefully and evenly.
Note: You should always clean your SUV well before wrapping. Work slowly and check your progress. Careful stretching keeps the wrap smooth and strong.
Installers also recommend using templates for your exact vehicle model. This helps you plan your design and avoid problem zones. You can ask your installer for a digital mockup before starting. This step lets you preview the wrap and make changes early.
You learn from real-world wraps and expert advice. Your Tesla Model Y or SUV can look professional and stand out on the road.
You can make your Tesla Model Y or SUV look special by following some easy steps. First, use templates and mockups to plan your design. This helps you avoid mistakes. Next, clean every surface before you start. This makes the wrap look smooth and neat. Pick colors and finishes that fit your style and mood. Try different ways to customize your car. This gives your SUV a unique look and keeps the paint safe.
Many people ask experts for help to get the best results. Experts can show you all the choices you have. A professional wrap costs between $4,000 and $6,500. If you want to do it yourself, DIY kits cost about $800 to $1,200.
Ask for a custom SUV wrap mockup or talk to an expert to start your project with confidence!
FAQ
Can you wrap a Tesla Model Y with roof rails?
Yes, you can wrap a Model Y with roof rails. You need to remove or carefully work around the rails. This step helps you get a smooth finish and protects the vinyl from lifting.
Does wrapping cover the cladding on SUVs?
You can wrap most cladding if it is smooth. Textured cladding does not hold vinyl well. Ask your installer to check the cladding before you start your project.
How long does a vinyl wrap last on an SUV?
A high-quality vinyl wrap lasts three to five years. You can extend the life by washing your SUV with mild soap and keeping it out of harsh sunlight.
Will a wrap protect my Tesla’s paint?
A wrap acts like a shield for your paint. You get protection from scratches, chips, and sun damage. You keep your original paint looking new.
Can you wash a wrapped SUV like normal?
You can wash your wrapped SUV with mild soap and water. Avoid high-pressure washers and harsh chemicals. Use a soft cloth to keep the wrap looking fresh.
What happens if the wrap gets damaged?
If your wrap gets scratched or torn, you can repair just the damaged section. You do not need to replace the whole wrap. Ask your installer for help with repairs.
Does wrapping affect sensors or cameras?
You need to keep sensors and cameras clear of vinyl. Wrapping over these parts can block signals. Always plan your design to avoid covering them.
Is it possible to remove the wrap later?
You can remove the wrap without harming your paint. Use heat and gentle pulling. Many owners change wraps for a new look every few years.


