

DIY Riders Love These Must-Have Motorcycle Decals for 2025


You can feel the buzz around motorcycle decals this year. Riders everywhere want to show off their style and make every motorcycle stand out. Maybe you picture bold colors or a sleek new pattern on your bike. Imagine pulling up and seeing heads turn.
Ready to try something new? Your next ride could look completely different with just a few creative touches.
Key Takeaways
- Motorcycle decals help you make your bike special and show your style. Decals keep your bike’s paint safe from scratches, sun, and rain. This helps your bike stay nice and new. You can change your bike’s look fast and cheap by switching decals when you want. The top decal styles for 2025 are reflective, vintage, minimalist, custom name plates, artist collaborations, and regional motifs. Picking the right size, color, finish, and good materials makes your decals look better and last longer. You can get decals online, at local stores, at events, from artists, or big shops. Each place has its own good points. Getting the surface ready, planning the layout, and using soapy water helps you put on decals without bubbles or mistakes. Taking care of your decals by cleaning gently, not using strong water sprays, and keeping them out of the sun helps them stay bright and new for a long time.
Why Motorcycle Decals


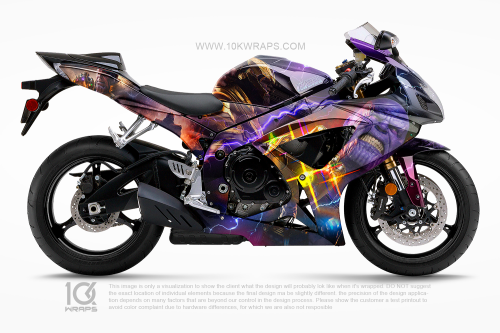
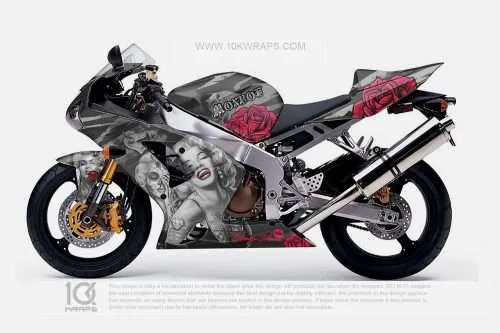
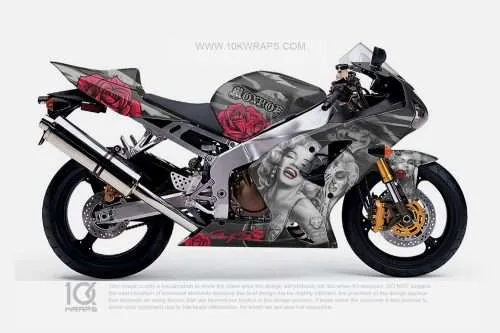

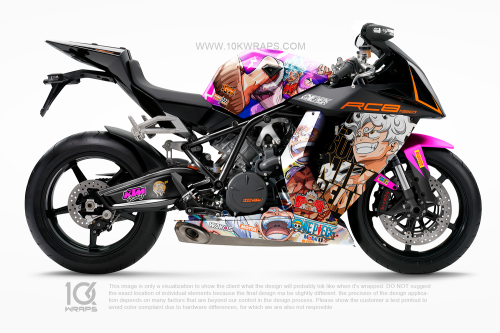
Personalization
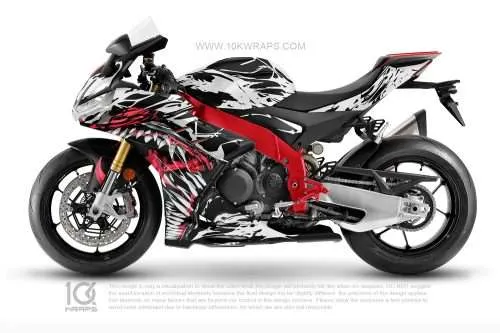
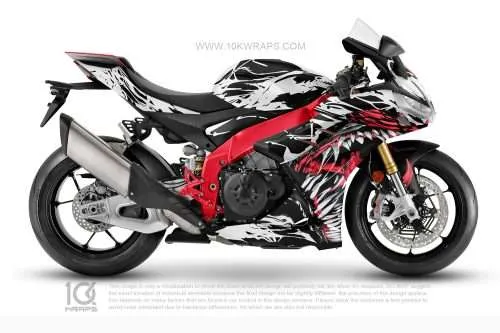
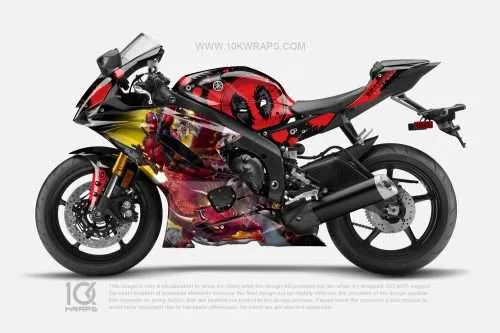
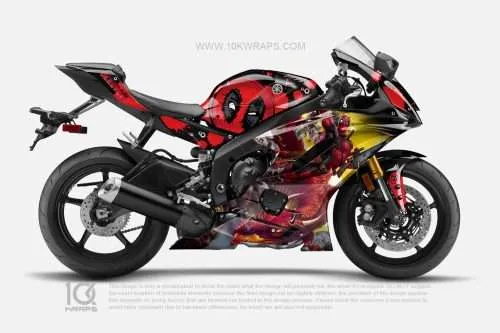
You want your bike to stand out. Motorcycle decals give you the power to show off your style. You can pick colors, patterns, or even your name. Maybe you like bold flames or a cool geometric look. You can find a design that matches your personality.
Social media and custom bike builders have made unique bikes more popular than ever. Riders everywhere want to share their own look. In North America, people love to customize and show off their bikes at events. E-commerce makes it easy for you to find and order new decals from anywhere. You can even upload your own designs or work with artists online.
Here’s a quick look at some trends in the market:
| Statistical Trend / Insight | Data / Description |
|---|---|
| Market CAGR (2025-2034) | 5.35% growth from USD 21.18 billion to USD 33.85 billion |
| Key Demand Drivers | Personalization via aftermarket parts, decorative elements |
| Influencing Factors | Social media influencers, custom bike builders, motorcycle events |
| E-commerce Impact | Easier access to personalization and accessories, boosting market expansion |
| Regional Insights | North America: strong customization culture and safety focus |
You can see that more people want to make their bikes unique. Motorcycle decals help you do that without a lot of effort.
Protection
You might not think about it, but decals do more than just look good. They help protect your bike’s paint from scratches, sun, and rain. If you ride a lot, you know how easy it is to get small chips or marks on your motorcycle. Decals act like a shield. They keep your paint looking fresh and new.
The market for safety gear and protective accessories is growing fast. In 2023, safety gear made up almost a third of all motorcycle accessories sold. People want their bikes to last longer and look better. Decals are an easy way to add a layer of protection while still showing off your style.
Affordability
You don’t need a big budget to change your bike’s look. Motorcycle decals cost much less than a new paint job. You can update your style whenever you want. If you get bored with one design, you can peel it off and try something new. Many riders like to switch things up for different seasons or events.
You can find decals in every price range. Some shops even offer deals if you buy a set. You get a fresh look and extra protection without spending a lot of money. That’s why so many riders choose decals for their bikes.
Easy Updates
You love to keep your bike looking fresh. Sometimes, you want a new look without a lot of work. That’s where easy updates come in. Motorcycle decals make it simple to change your style whenever you feel like it. You don’t need to spend hours in the garage or pay for a full paint job. You just peel off the old design and stick on a new one.
Let’s say you want to match your bike to the season. You can go for bright colors in the summer and darker shades in the fall. Maybe you want to show off a special design for a big ride or event. You can swap out your decals in minutes. No mess, no stress.
Tip: Always save your favorite decals. You might want to use them again later!
Here’s why easy updates matter for you:
- Quick Changes: You can update your bike’s look in less than an hour. No need for special tools or skills.
- No Commitment: If you get tired of a design, you can remove it. Try something new anytime.
- Less Risk: You don’t have to worry about ruining your paint. Decals protect your bike and come off clean.
- Fun for Everyone: You can invite friends over and make it a group project. Everyone can try different styles.
You might wonder how often you can change your decals. The answer is simple: as often as you want! Some riders switch them every few months. Others like to keep the same look for a year. It’s all about what makes you happy.
If you ride in different groups or clubs, you can use decals to show your support. You can add a club logo for one event, then switch to a different design for another. This keeps your bike looking fresh and helps you stand out.
Many shops now offer kits that make updates even easier. You get everything you need in one package. Some even include tools and step-by-step guides. You can find these kits online or at your local motorcycle shop.
Motorcycle decals give you the freedom to change your bike’s look whenever you want. You stay in control of your style. You get to decide when it’s time for something new.
Trending Motorcycle Decals
Reflective Styles
You want to ride safe and look cool at the same time. Reflective styles help you do both. These decals shine bright when headlights hit them at night. You get more visibility on the road, which means drivers see you sooner. Many riders in North America and Europe love these decals because they ride in all kinds of weather and need extra safety.
Reflective decals come in many shapes and colors. You can pick stripes, flames, or even custom patterns. Some riders add reflective touches to their helmets or saddlebags, too. New materials like UV-resistant inks and high-quality vinyl make these decals last longer, even in rain or sun.
Tip: Try adding reflective strips to the sides of your bike. You will notice a big difference during night rides.
Vintage Looks
Do you like the classic look? Vintage decals bring back the old-school style. You can choose designs that remind you of racing bikes from the past or retro logos from famous brands. Many riders use vintage decals to show off their love for motorcycle history.
Vintage styles are popular because they help you express your personality. You might see bold numbers, pinstripes, or faded colors that look like they came from another era. These decals work great on both new and older bikes. Advances in decal materials mean you get that classic look with modern durability.
You can find vintage kits online or at local shops. Some even let you customize the colors or add your own twist. Vintage decals are a top pick for riders who want to stand out and celebrate the past.
Minimalist Designs
Maybe you want something simple and clean. Minimalist designs are perfect for you. These decals use basic shapes, thin lines, and soft colors. Younger riders love this style because it looks modern and fresh. You can make your bike look sharp without too much flash.
Minimalist decals are easy to match with any motorcycle color. You can add a small logo, a single stripe, or a geometric pattern. Less is more with this trend. Digital platforms make it easy to design your own minimalist look. You just upload your idea and see how it fits your bike.
Recent market analysis shows that minimalist styles are growing fast. Riders want a look that feels personal but not too busy. If you like a modern vibe, minimalist decals are a great choice.
Custom Name Plates
You want your bike to feel like it truly belongs to you. Custom name plate decals help you do just that. These decals let you put your name, nickname, or even a favorite phrase right on your motorcycle. You can choose the font, color, and size. Some riders add numbers, flags, or small icons to make their name plate stand out even more.
Custom name plates are popular because they make your bike unique. You can show off your personality or give your ride a cool nickname. Many riders use these decals for club names or to mark special rides and events. You might see bikes with names like “Night Rider,” “Thunderbolt,” or even just a bold first name.
Tip: Try matching your name plate color with your bike’s main color for a clean, pro look.
Here’s why you might love custom name plate decals:
- Easy to Design: Many online shops let you type in your name and see a preview right away. You can try different fonts and colors until you find the perfect match.
- Fast Shipping: Most shops ship custom decals quickly. You won’t have to wait long to see your new look.
- Durable Materials: Good name plate decals use weather-resistant vinyl. Your name stays bright and clear, even after rain or sun.
- Great for Groups: If you ride with friends or a club, you can all get matching name plates. It helps everyone feel like part of the team.
You can place your name plate on the tank, side panels, or even the front fender. Some riders like to put a small name plate on their helmet, too. If you ever want to change it, just peel it off and try a new style.
Custom name plates make your bike feel personal. You get to show the world who you are every time you ride.
Artist Collaborations
You want your bike to stand out from the crowd. Artist collaborations give you that chance. Many top decal brands now team up with famous artists, tattoo designers, and street art legends. These partnerships bring bold, fresh artwork right to your motorcycle.
When you choose a decal from an artist collaboration, you get more than just a sticker. You get a piece of real art. Some artists create limited-edition designs. Others offer custom work just for you. You can find everything from wild graffiti styles to detailed hand-drawn animals.
Note: Artist collabs often sell out fast. If you see a design you love, grab it before it’s gone!
Here’s why you might love artist collaboration decals:
- Unique Looks: No one else will have the same design as you.
- Support Creators: You help artists grow their brand and reach new fans.
- Conversation Starter: People will ask about your bike’s artwork.
- Collectible Value: Some decals become collector’s items.
Many online shops now feature artist spotlights. You can read about the artist, see their other work, and even follow them on social media. Some brands let you vote on the next artist to join their lineup. You get to help shape the trends.
If you want to go even further, you can reach out to local artists. Ask if they want to design something just for you. Many artists love working with motorcycle fans. You get a one-of-a-kind look, and they get to show off their skills.
Here’s a quick table to help you spot the best artist collab decals:
| Feature | Why It Matters |
|---|---|
| Limited Editions | Rare and special, not mass-produced |
| Artist Signature | Shows authenticity and supports artists |
| Story Behind the Art | Adds meaning to your bike’s look |
| Custom Options | Lets you tweak colors or details |
You can turn your motorcycle into a rolling art gallery. Every ride becomes a showcase for creativity.
Regional Motifs
You might want your bike to tell a story about where you come from. Regional motifs let you do just that. These decals use symbols, patterns, and colors from your hometown, state, or country. You can show pride in your roots every time you ride.
Regional decals come in many styles. Some use classic flags or city skylines. Others feature local wildlife, flowers, or famous landmarks. You might see tribal patterns, mountain ranges, or even food icons from your area.
Tip: Mix a regional motif with your favorite color for a look that feels both personal and stylish.
Why do riders love regional motifs?
- Show Local Pride: You can represent your city, state, or country.
- Connect with Others: Other riders spot your decal and start a conversation.
- Celebrate Culture: You can honor your heritage or favorite places.
- Easy to Customize: Many shops let you pick colors or add text.
You can find regional decals at local bike shops, online stores, or even at motorcycle events. Some brands work with local artists to create designs that feel true to your area. You can also upload your own photos or sketches to make a custom decal.
Here are some popular regional motif ideas for 2025:
- City skylines with sunset colors
- State flowers or animals
- Tribal or indigenous patterns
- Famous roads or highways
- Local sports team logos
You can use regional motifs on your tank, fenders, or even your helmet. Every ride becomes a way to share your story and connect with your community.
Choosing Decals
Size and Fit
You want your decals to look perfect on your bike. The right size and fit make all the difference. If you pick decals that are too big, they might wrinkle or cover up important parts. If you go too small, they can get lost and not stand out.
Start by measuring the area where you want to place your motorcycle stickers. Use a tape measure or a ruler. Write down the width and height. Many online shops let you enter these numbers when you order. Some even show you a preview of how your custom stickers will look on your motorcycle.
You can also find decals in many shapes. Some are made for tanks, fenders, or side panels. Others work best on helmets or windshields. If you want something special, try uploading your own design. Online tools let you pick the exact size and shape you need. You can even order large decals, up to 52 inches wide, for a bold look.
Tip: Always double-check your measurements before you order. It saves time and helps you avoid mistakes.
Color and Finish
Color can change the whole vibe of your bike. Bright colors make your motorcycle pop. Dark colors give it a cool, sleek look. You can match your decals to your bike’s paint or pick something that stands out.
Most shops offer a color chart. You can see what each color looks like before you buy. Some online tools let you try different colors and finishes on a digital bike. You can mix and match until you find the perfect style.
Finishes matter, too. You can choose from glossy, matte, or even metallic. Glossy finishes shine in the sun. Matte finishes look smooth and modern. Metallic finishes add a bit of sparkle. Some shops let you order free samples, so you can see and feel the finish before you decide.
Here’s a quick table to help you compare finishes:
| Finish Type | Look & Feel | Best For |
|---|---|---|
| Glossy | Shiny, bright | Sporty, bold designs |
| Matte | Smooth, no shine | Modern, subtle styles |
| Metallic | Sparkly, eye-catching | Custom, standout bikes |
Try matching your decal color with your helmet or riding gear for a complete look.
Material Quality
You want your motorcycle stickers to last. Good material keeps your bike looking sharp, even after rain or sun. Most high-quality decals use vinyl with weather-resistant lamination. This means your custom stickers stay bright and strong, no matter where you ride.
When you shop for decals, look for these features:
- Weather-resistant vinyl
- Lamination for extra protection
- UV-resistant inks
- Free samples to test quality
Many shops let you order a free sample. You can check the feel and see how the sticker holds up outside. If you have questions, customer service reps can help you pick the best material for your needs.
You can also find decals in clear vinyl. These work well if you want your bike’s paint to show through. Some shops offer different types of vinyl for indoor or outdoor use. Always pick the one made for motorcycles, so you get the best durability.
Good material means less fading, peeling, or cracking. Your bike stays looking fresh for longer.
Where to Buy
You want the best decals for your motorcycle. You have many places to shop. Each option has its own perks. Let’s break it down so you can find what works for you.
1. Online Decal Shops
Most riders start online. You get the biggest selection and the latest designs. Many websites let you use custom design tools. You can upload your own images or play with templates. Some sites even let you work with real designers. You send your idea, and they help you make it perfect.
Tip: Look for shops that offer free digital proofs. You get to see your design before you buy.
Here are some things to check when shopping online:
- Custom Tools: Try sites with easy drag-and-drop editors.
- Upload Options: Pick a shop that lets you upload your own art or photos.
- Designer Help: Some sites offer live chat with designers.
- Material Choices: Make sure you can pick weather-resistant vinyl.
- Shipping: Fast shipping means you get your decals sooner.
2. Local Motorcycle Shops
You can visit a local bike shop. Many shops carry popular decal brands. You get to see and touch the decals before you buy. Some shops offer custom orders. You talk to staff and get advice on what fits your bike.
Note: Local shops sometimes host decal workshops. You can learn how to apply decals from experts.
3. Motorcycle Events and Shows
Bike events are great for finding unique decals. Vendors bring limited-edition designs. You meet artists and see their work up close. You might even find regional or club-specific decals that you can’t get anywhere else.
4. Direct from Artists
Some riders want something truly special. You can reach out to artists on social media or through their websites. Many artists take custom orders. You get a one-of-a-kind design and support a creator at the same time.
5. Big Retailers and Marketplaces
Large online marketplaces like Amazon and eBay have a huge selection. You find deals and read lots of reviews. Just make sure you check the seller’s ratings and look for weatherproof materials.
Here’s a quick table to help you compare your options:
| Where to Buy | Best For | What to Watch For |
|---|---|---|
| Online Decal Shops | Custom designs, big selection | Proofs, shipping speed, quality |
| Local Motorcycle Shops | Seeing samples, expert advice | Limited stock, higher prices |
| Events & Shows | Unique finds, artist meetups | Limited time, cash-only vendors |
| Direct from Artists | One-of-a-kind, personal touch | Longer wait, higher cost |
| Big Retailers | Deals, fast shipping | Mixed quality, check reviews |
Pro Tip: Always read reviews and check return policies before you buy. Good shops stand by their products.
You have more choices than ever in 2025. Try a few different places. Mix online tools with local advice. You will find the perfect decals for your ride and your style.
Applying Decals
Surface Prep
You want your decals to stick and last. Good surface prep makes all the difference. Start by washing your bike with soap and water. Dry it with a clean towel. Dirt and grease can mess up the installation. If you see any wax or polish, wipe it off with rubbing alcohol. This step helps the adhesive grip better.
If you need to remove old graphics, use a heat gun or hair dryer. Warm up the old decal until it feels soft. Peel it off slowly. Sticky residue can stay behind. Rub it away with alcohol or a sticker remover. Always let the area dry before installing graphics.
Tip: Work in a shaded spot. Direct sunlight can make the surface too hot and cause problems during installation.
Layout Planning
Before applying graphics, plan where each decal will go. Lay out your decals on the bike without peeling the backing. Move them around until you like the look. Use painter’s tape to mark the spots. This step helps you avoid mistakes and keeps everything straight.
Flat stickers work best on flat surfaces. Curved areas can be tricky. If you want to install the graphics on a curve, pick flexible vinyl. Take your time with this step. A little planning saves you from crooked or uneven decals.
Pro Tip: Snap a quick photo of your layout. You can use it as a guide during installation.
Application Steps
Now you are ready for installation. The soapy water method works great for positioning and bubble removal. Mix a few drops of dish soap in a spray bottle with water. Spray the area where you want to place the decal. Peel off the backing and lay the decal on the wet surface. You can slide it around until it looks perfect.
Use a credit card or squeegee to smooth out the decal. Start in the center and push out toward the edges. This step removes air bubbles and extra water. Wipe away any leftover moisture with a soft cloth.
Let the decal dry for at least 24 hours. Avoid washing your bike or riding in heavy rain right after installation. If you see small bubbles, don’t worry. They often disappear as the decal sets.
Note: Apply decals in moderate temperatures. Extreme heat or cold can affect the adhesive and make installation harder.
Here’s a quick checklist for a smooth installation:
- Wash and dry the surface
- Remove old graphics if needed
- Plan your layout with tape or photos
- Use the soapy water method for positioning
- Smooth out bubbles with a squeegee
- Let the decal dry before riding
You can install the graphics yourself and get pro results. Take your time, follow these steps, and your bike will look amazing.
Aftercare
You finished the installation. Now you want your decals to last and look sharp. Good aftercare keeps your motorcycle graphics bright and fresh for a long time. Here’s how you can protect your new look and avoid common problems.
1. Wait Before Washing
Give your decals time to set. Wait at least 48 hours before you wash your bike. This helps the adhesive bond well. If you wash too soon, you might lift the edges or cause bubbles.
2. Clean Gently
Use a soft sponge and mild soap when you clean your motorcycle. Avoid harsh chemicals or rough brushes. These can scratch the decals or make the colors fade. Rinse with cool water and dry with a soft towel.
3. Watch for Edges
Check the edges of your decals after installation. If you see any spots lifting, press them down with your thumb. You can use a hair dryer on low heat to help the adhesive stick better. Just don’t overheat the area.
Tip: If you ride in the rain, check your decals after each ride. Water can sometimes loosen the edges, especially right after installation.
4. Protect from Sun and Weather
Park your bike in the shade when you can. Too much sun can fade the colors over time. If you store your motorcycle outside, use a cover. This keeps your decals safe from rain, dust, and UV rays.
5. Remove Bugs and Dirt Quickly
Bugs and road grime can stick to your decals. Clean them off as soon as you can. Dried bugs can be hard to remove and may damage the finish.
6. Avoid High-Pressure Washers
High-pressure water can lift or peel your decals. Stick to gentle hand washing. If you must use a hose, keep the spray light and don’t aim right at the edges.
Here’s a quick table to help you remember the best aftercare tips:
| Aftercare Step | Why It Matters |
|---|---|
| Wait to wash | Lets adhesive set |
| Clean gently | Prevents scratches and fading |
| Check edges | Stops peeling early |
| Shade and cover | Protects from sun and rain |
| Remove bugs fast | Keeps finish looking new |
| No high-pressure wash | Prevents lifting and peeling |
Taking care of your decals is easy. Just follow these steps, and your motorcycle will keep turning heads long after installation. You put in the work—now enjoy the results!
Custom Motorcycle Graphics
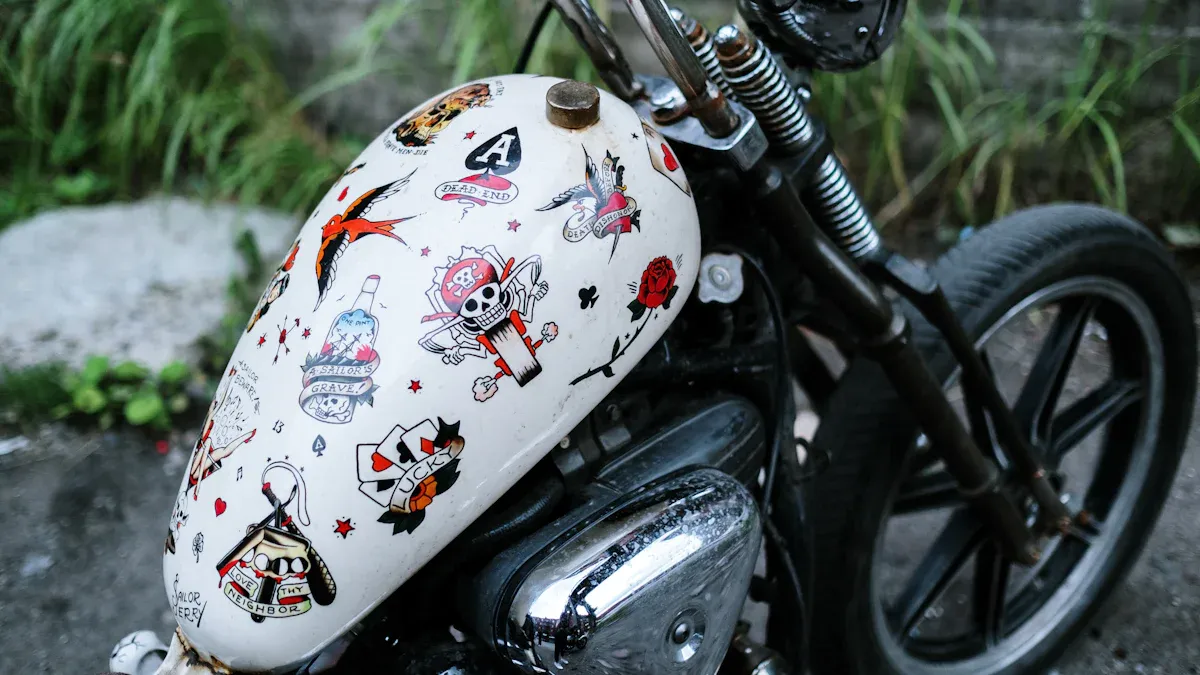
Mixing Designs
You want your motorcycle to look different from everyone else’s. Mixing designs is a great way to do that. You can combine different custom stickers, patterns, and colors to create a style that is all your own. Maybe you like flames on the tank and racing stripes on the fenders. You can even add small logos or symbols to make your bike stand out.
Online platforms make this easy. Many sites let you drag and drop different designs onto a digital bike. You can see how everything looks before you order. Some shops offer sticker packs with matching themes. You can mix and match these packs to get a cool, layered effect. If you want to go bold, try mixing bright colors with black or chrome. If you like a classic look, stick with simple shapes and a few colors.
Tip: Try using a few small custom stickers in different spots. This gives your bike a balanced look without making it too busy.
Layering
Layering takes your custom motorcycle graphics to the next level. You can place one sticker over another to build depth and texture. Start with a base layer, like a big stripe or background shape. Then add smaller custom stickers on top. This method works well if you want to highlight certain parts of your motorcycle.
Many riders use layering to show off their favorite brands or clubs. You can put a large logo on the side and add smaller details around it. Some motorcycle decoration kits come with pieces made for layering. These kits help you get a pro look without much effort.
When you layer, make sure each sticker is smooth and flat. Use a squeegee or credit card to press out any bubbles. Let each layer dry before adding the next one. This keeps your graphics looking sharp and clean.
Personal Touches
Adding personal touches makes your bike feel special. You can use your name, a favorite quote, or even a custom drawing. Many shops let you upload your own art or text. You can also work with designers to create custom motorcycle stickers that match your ideas.
If you ride with a group, you might want to add your club name or a special symbol. Some riders use custom stickers to mark big trips or events. You can even order sticker packs with your favorite colors or themes.
Note: Personal touches turn your motorcycle into a story. Every sticker can remind you of a ride, a friend, or a goal.
Custom motorcycle graphics give you endless ways to express yourself. You can mix, layer, and personalize until your bike feels just right.
DIY Tools
You want to create your own look for your bike. DIY tools make this easy and fun. You do not need to be a pro designer. Many online platforms give you simple templates. You can drag and drop shapes, colors, and text. Some sites let you upload your own photos or drawings. You see a preview of your design before you order.
You can also find free apps for your phone or tablet. These apps help you test out ideas on a digital bike. You can try different colors, fonts, and patterns. If you like what you see, you can save your design and send it to a decal maker.
Tip: Always save your work as you go. You do not want to lose your favorite design by accident!
Here are some popular DIY tools you might want to try:
- Online Design Studios: These websites let you build your own decal from scratch. You can use their art or upload your own.
- Vinyl Lettering Services: You type in your text, pick a font, and choose a color. The service prints it for you.
- Printable Templates: Download a blank template for your bike model. Draw your design by hand or on your computer.
- Cutting Machines: If you want to make decals at home, try a vinyl cutter like Cricut or Silhouette. These machines cut out your design from special vinyl sheets.
You can also buy custom kits for street bikes or off-road bikes. These kits come with everything you need—pre-cut decals, squeegees, and instructions. You just follow the steps and stick them on your bike.
Here’s a quick table to help you pick the right DIY tool:
| Tool Type | Best For | Skill Level |
|---|---|---|
| Online Design Studio | Custom graphics, easy preview | Beginner |
| Vinyl Lettering | Names, numbers, simple text | Beginner |
| Printable Templates | Hand-drawn or digital art | Intermediate |
| Vinyl Cutter Machine | Full DIY, home production | Advanced |
DIY tools put you in control. You get to decide how your bike looks. You can change your style as often as you want. With the right tools, you can turn any idea into a real decal. Custom motorcycle graphics have never been easier to make on your own.
Common Mistakes
Misalignment
You want your decals to look sharp and professional. Misalignment can ruin the whole look of your bike. Sometimes, you stick a decal on and realize it’s crooked or off-center. This happens more often than you think.
You can avoid misalignment by planning your layout before you peel off the backing. Place the decal on your bike with the backing still on. Use painter’s tape to mark the edges. Step back and check from different angles. If it looks good, you’re ready to stick it down.
Tip: Always measure twice and stick once. A few extra seconds can save you from a lot of frustration.
If you do make a mistake, don’t panic. Gently peel the decal back up right away. If it’s a high-quality vinyl, you can usually reposition it once or twice. Try not to stretch or crease the material. If you can’t fix it, you might need to start over with a new decal.
Here’s a quick checklist to help you avoid misalignment:
- Mark the placement with tape
- Double-check your measurements
- Use a level or ruler for straight lines
- Get a friend to help with large decals
Bubbles
Bubbles under your decals can make your bike look messy. They also let dirt and water get underneath, which can cause peeling. You want your decals to look smooth and clean.
Bubbles usually happen when you rush the application or skip the soapy water method. Air gets trapped under the vinyl. You can prevent this by spraying a light mist of soapy water on the surface before you apply the decal. This lets you slide the decal into place and push out any air.
Use a squeegee or a credit card to smooth the decal from the center out to the edges. Work slowly and press firmly. If you see small bubbles after you finish, don’t worry. Many will disappear as the decal dries.
Note: For stubborn bubbles, use a pin to poke a tiny hole and press the air out gently.
Here’s a simple table to help you remember what to do:
| Problem | How to Fix It |
|---|---|
| Small bubbles | Wait 24 hours, they may vanish |
| Large bubbles | Use a pin, press air out |
| Many bubbles | Remove and reapply decal |
Poor Prep
You might feel excited to get your new look on your bike. Skipping prep work is a big mistake. Dirt, grease, or old wax can stop decals from sticking. Poor prep leads to peeling, bubbles, and faded colors.
Always start by washing your bike with soap and water. Dry it with a clean towel. Use rubbing alcohol to wipe the area where you’ll put the decal. This removes any leftover oils or polish. If you see old stickers, take them off first. Use a heat gun or hair dryer to soften the glue, then peel slowly.
Pro Tip: Never rush the prep. Clean surfaces help your decals last longer and look better.
Here’s a quick prep checklist:
- Wash and dry the area
- Remove old decals and glue
- Wipe with rubbing alcohol
- Let the surface dry completely
You set yourself up for success when you prep the right way. Your decals will stick better, look smoother, and last longer.
Low-Quality Materials
You might feel tempted to grab the cheapest decals you can find. Maybe you see a cool design online for a few bucks and think, “Why not?” Here’s the thing—low-quality materials can ruin your bike’s look faster than you think.
Cheap decals often use thin vinyl or weak glue. These stickers peel, crack, or fade after just a few rides. You might notice the edges curling up or the colors turning dull in the sun. Sometimes, the print even smears when you wash your bike. You want your motorcycle to look sharp, not worn out.
Tip: Always check the product details before you buy. Look for words like “weather-resistant,” “UV-protected,” or “laminated vinyl.” These features help your decals last longer.
Here’s what can happen if you use low-quality materials:
- Peeling: The sticker starts to lift at the corners. Dirt and water get underneath, making it worse.
- Fading: Sunlight bleaches the colors. Your bold design turns pale and boring.
- Cracking: The vinyl dries out and splits. This looks messy and can damage your paint.
- Sticky Residue: Cheap glue leaves a mess when you try to remove the decal. Cleaning it off takes time and effort.
You can spot low-quality decals by checking a few things:
| What to Check | What You Want to See |
|---|---|
| Vinyl Thickness | Feels sturdy, not flimsy |
| Adhesive Strength | Sticks well, but not too sticky |
| Print Quality | Colors look bright and sharp |
| Finish | Smooth, even surface |
You should also read reviews before you buy. Other riders will tell you if a decal holds up or falls apart. If a shop offers free samples, grab one. Test it on a small spot first.
You might think you’re saving money with cheap decals, but you’ll end up replacing them more often. High-quality materials cost a bit more, but they last longer and look better. You get brighter colors, smoother finishes, and less hassle.
Note: Good decals protect your paint, too. They act like a shield against scratches and sun damage.
When you shop for decals, pick brands that use premium vinyl and strong adhesives. Ask the seller if you’re not sure. A little research now saves you a lot of trouble later. Your bike deserves the best—don’t settle for less.
Rider Stories
Transformations
You might wonder how much a few decals can change your ride. Many DIY riders have seen huge transformations with just a little creativity. You can turn an old, faded bike into something that looks brand new. Some riders start with a plain color and add bold stripes or custom name plates. Others mix vintage decals with modern designs for a unique look.
Here are a few ways you can transform your bike:
- Add reflective decals for safety and style.
- Use regional motifs to show off your hometown pride.
- Layer minimalist graphics for a clean, modern vibe.
- Try artist collaborations for a one-of-a-kind look.
“I never thought a few stickers could make my bike feel so different. Now, every time I ride, people ask where I got my graphics!” — Jamie, DIY rider
Before & After
You can really see the difference when you look at before and after photos. Riders often share these pictures online to inspire others. A dull tank becomes a work of art. Scratched fenders look fresh again. You might even feel more excited to ride when your bike looks new.
Here’s a simple table to show what changes most:
| Before | After |
|---|---|
| Faded paint | Bright, bold graphics |
| Scratches and chips | Covered and protected |
| Plain panels | Custom designs and colors |
| Old club logos | Fresh, updated styles |
Tip: Take a photo before you start. You’ll love seeing how far your motorcycle has come!
Community Picks
You are not alone in your love for custom decals. Many riders join online groups or local clubs to share ideas. These communities often vote on their favorite designs each year. You can find inspiration and even get advice on the best places to buy decals or how to apply them.
Popular community picks for 2025 include:
- Glow-in-the-dark stripes for night rides 🌙
- Retro racing numbers for a classic touch 🏁
- Eco-friendly decals made from recycled materials 🌱
You can join the conversation by posting your own photos or asking for feedback. Many riders love to help others get the perfect look. Your next idea might come from a friend or a fellow rider you meet online.
You have so many ways to make your motorcycle stand out in 2025. Custom decals let you show your style, protect your ride, and join a growing DIY community. More riders want to express themselves and connect with others who love creativity. Social media and new trends make it easy to share your results. Try a new design, use online tools, and join a group of riders who inspire each other. Start your project today and see how much fun you can have!
FAQ
How long do motorcycle decals last?
Most high-quality decals last 3–5 years. You can make them last longer if you clean your bike often and park in the shade. Weather and sun can fade colors over time.
Can I remove decals without damaging my paint?
Yes! Use a hair dryer or heat gun to warm the decal. Peel it off slowly. Sticky spots? Rub them with alcohol. Your paint should stay safe if you go slow.
Will decals stick to any surface on my bike?
Decals stick best to smooth, clean surfaces. Avoid rough or dirty spots. Wipe the area with alcohol before you start. Flat panels work better than curved or textured parts.
Can I design my own decal online?
Absolutely! Many websites let you upload your art or use design tools. You can pick colors, shapes, and text. Some sites even show a preview on a digital bike.
What should I do if bubbles appear under my decal?
Don’t worry! Use a squeegee or credit card to push bubbles out. For stubborn ones, poke a tiny hole with a pin and press the air out. Most small bubbles disappear after a day.
Are motorcycle decals waterproof?
Yes, most motorcycle decals use waterproof vinyl. Rain and splashes won’t hurt them. For best results, let your decals dry for 48 hours before you wash or ride in wet weather.
Can I reuse decals after removing them?
Usually, you can’t reuse decals. The adhesive loses strength when you peel them off. If you want to change styles often, buy extra sets or save your favorite designs for next time.
Reference
• AutoTech Insights. (2024). Consumer trends in compact car upgrades: Focus on Honda Civic. AutoTech Market Reports, 16(2), 45–60. https://www.autotechinsights.com/compact-honda-trends
• MotoStyle Pro. (2023). How vinyl decals revolutionized motorcycle customization. MotoStyle Journal, 10(3), 29–38. https://www.motostylepro.com/vinyl-bike-decals
• Wrap Garage Weekly. (2024). Top 2025 trends in motorcycle graphics. Wrap Garage Magazine, 12(1), 19–28. https://www.wrapgarageweekly.com/2025-bike-graphics
• DIY Moto Hub. (2022). Beginner’s guide to applying motorcycle decals at home. DIY Moto Series, 6(5), 14–23. https://www.diymotohub.net/motorcycle-decals-guide
• Rider Mods Daily. (2023). The rise of anime motorcycle decals among DIY riders. Rider Mods Insight, 9(2), 33–41. https://www.ridermodsdaily.com/anime-bike-decals
• Custom Wheels Magazine. (2024). 10 best sticker kits for sportbikes. Custom Wheels Review, 13(4), 44–53. https://www.customwheelsmag.com/top-bike-sticker-kits
• MotoGraphix World. (2023). Comparing 3M vs Avery vinyl for motorcycles. Graphix World Tech Reports, 11(6), 21–30. https://www.motographixworld.com/vinyl-comparison
• SpeedStyle Culture. (2024). The fusion of JDM, anime, and motorcycles. SpeedStyle Culture Digest, 15(3), 38–47. https://www.speedstyleculture.com/jdm-anime-bike-wraps
• RideKraft Reviews. (2022). Best practices for long-lasting motorcycle decals. RideKraft Tech Guide, 8(1), 26–35. https://www.ridekraftreviews.net/motorcycle-decal-care
• Urban Moto Trends. (2023). Minimalist vs. graphic-heavy decals: Which fits your style? Urban Moto Insights, 7(4), 12–20. https://www.urbanmototrends.com/decal-style-guide


